Welcome to Spring Nail Art
Spring is a season of renewal, filled with blooming flowers, vibrant colors, and a refreshing atmosphere. As the days get warmer, it’s time to swap out those winter shades for lively nail art that reflects the beauty of nature. Nail art is not just a trend; it’s a way to express your creativity and individuality. This year, we bring you three delightful spring nail tutorials by the talented nail tech Billie Arnet, also known as @bjnailedit.
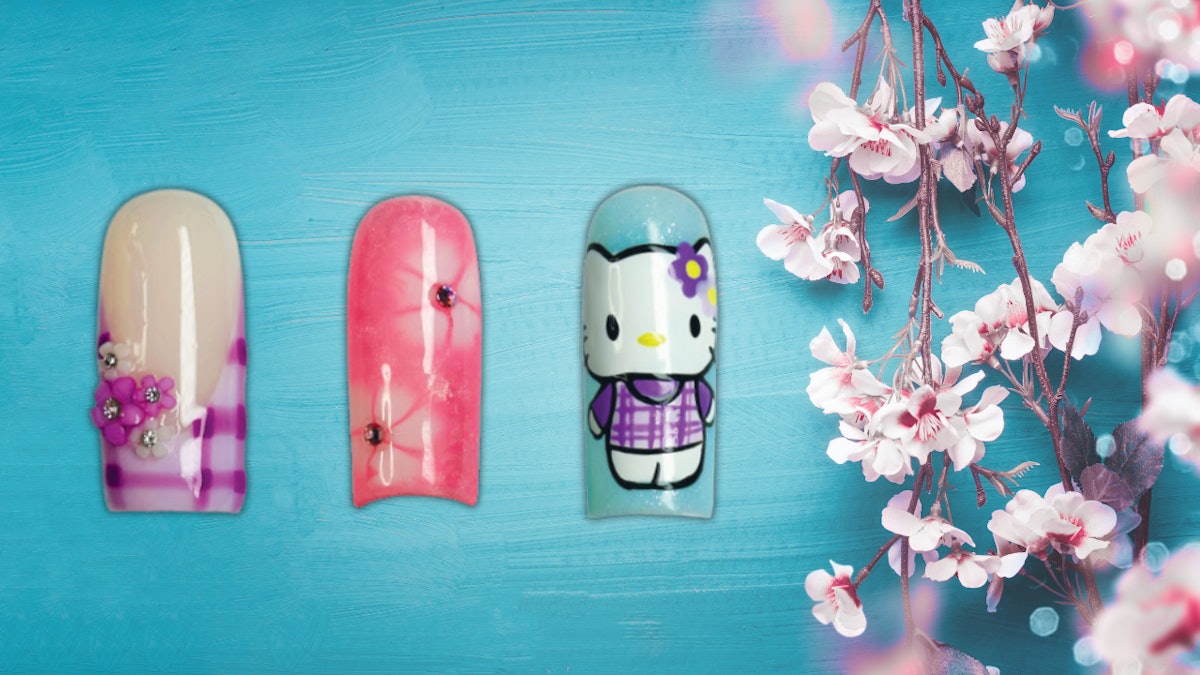
1. Adorable Spring Hello Kitty Nails
If you’re a fan of cute designs, this Hello Kitty-inspired nail art is perfect for you. It combines playful charm with vibrant colors, making it a fun choice for any spring outing.
What You’ll Need:
- Nail polish: White, pink, yellow, and black
- Nail art brush or dotting tool
- Top coat
- Nail file and buffer
Step-by-Step Instructions:
- Start by preparing your nails. File and buff them to create a smooth surface.
- Apply a base coat to protect your nails and let it dry completely.
- Paint your nails with a white base color as it will bring out the colorful designs.
- Once the white base is dry, use a nail art brush to paint Hello Kitty’s face on your accent nails. Begin with the basic shape and then add details like her eyes, nose, and iconic bow using pink and yellow polish.
- For the remaining nails, create small flowers or polka dots using bright colors to complement the Hello Kitty design.
- Finish with a top coat to seal your design and add shine.
2. Vibrant Purple and Pink Floral Nails
This design captures the essence of spring with flowers blooming in vibrant hues. It’s elegant yet eye-catching, perfect for any spring celebration.
What You’ll Need:
- Nail polish: Purple, pink, and green
- Nail art brushes
- Base and top coat
Step-by-Step Instructions:
- As always, start with a clean and filed nail surface.
- Apply a base coat followed by two coats of a light purple polish to each nail.
- Using a fine nail art brush, create flower shapes with pink polish. You can make them as simple or as detailed as you like.
- Add leaves with green polish around the flowers for a pop of contrast.
- Complete your look with a glossy top coat to make your floral art really stand out.
3. Abstract Geometric Spring Nails
If you’re looking for something more modern, try these abstract geometric nails. This style uses shapes and lines to create an artistic effect that is perfect for the spring season.
What You’ll Need:
- Nail polish: Pastel colors like mint, peach, and lavender
- Nail striping tape
- Base and top coat
Step-by-Step Instructions:
- Begin by prepping your nails as before.
- Apply a base coat and follow with a pastel color of your choice for a base layer, allowing it to dry.
- Using nail striping tape, create geometric shapes on your nails. You can form triangles, lines, or even checker patterns.
- Fill in the shapes with different pastel colors, allowing each section to dry before applying the tape for the next section.
- Once you remove the tape, use a top coat to give your design a polished finish.
Final Thoughts
Nail art is a fabulous way to embrace the season and showcase your personality. These spring nail tutorials by Billie Arnet offer a blend of cuteness, elegance, and modern flair that is sure to keep your nails on trend. Remember to share your nail designs on social media and tag Billie Arnet for a chance to be featured!
Happy Spring Nail Art!


