Introduction to Santa Stitch Nail Art
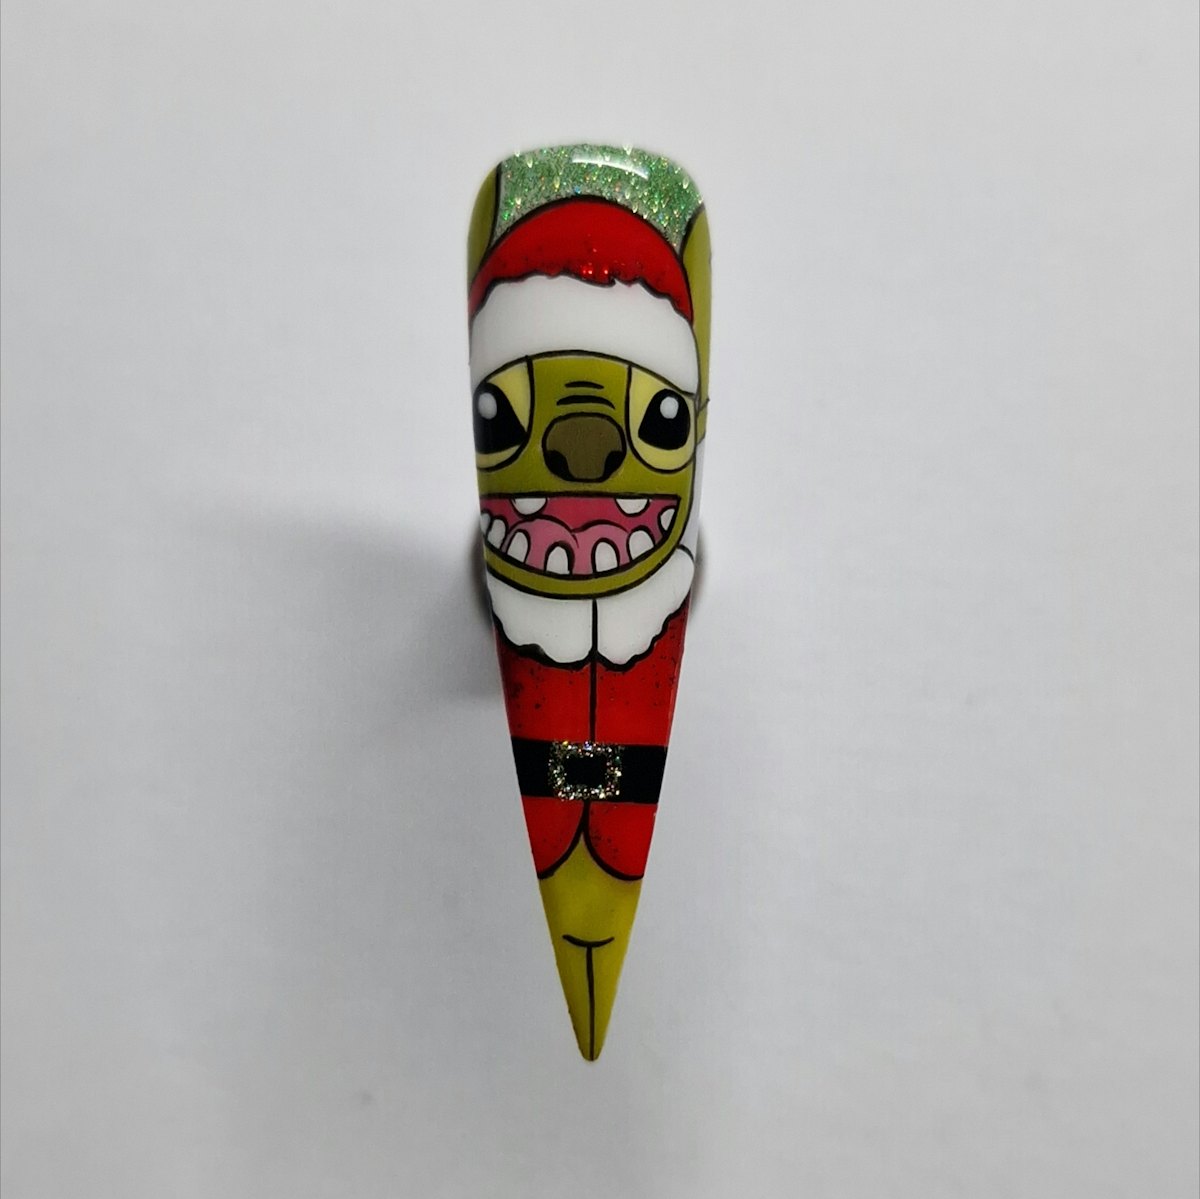
Nail art has become a popular form of self-expression and creativity, especially during the festive season. One unique design is the Santa Stitch, which combines elements from the beloved character Stitch with a Christmas twist. In this tutorial, we will guide you through the steps to create this adorable Santa Stitch nail art, inspired by the expertise of Kamila Borowiec, owner of @Glamliciousnails and a multi-award-winning nail artist.
Supplies Needed
- White gel polish
- Matte top coat
- Grey gel polish
- Fine liner brush
- Green gel polish
- Yellow gel polish
- Red glittery gel polish
- Nail lamp for curing
Step-by-Step Guide to Create Santa Stitch
Step 1: Prepare Your Base
Start by painting the tips of your nails with white gel polish. Once you’ve applied the polish, cure it under a nail lamp and then apply a matte top coat. Cure again to set it properly.
Step 2: Sketch the Character
Use a fine liner brush and grey gel polish to begin sketching Santa Stitch. Start with the hat and fur, making sure to outline these elements carefully. Cure the design once you are satisfied with your initial sketch.
Step 3: Outline the Face
Next, sketch a circle for Stitch’s face. Add details like the eyes, nose, and mouth. Cure again to secure your work.
Step 4: Complete the Body Sketch
Finish sketching the rest of Stitch’s body and then cure this layer thoroughly. Ensure that every detail is as you want before moving on to coloring.
Step 5: Filling In the Colors
Once your sketch is completely cured, start filling in the colors one by one. Remember to cure after each color application. Focus on painting Stitch’s face in green, and for the eyes and nose, use yellow. Also, paint the inside of the eyes and mouth with the respective colors. Cure this layer afterward.
Step 6: Coloring the Body
For the remainder of Stitch’s body, start by painting the fur first. Cure each part separately to ensure everything is properly set.
Step 7: Outlining for Definition
With a thin liner brush, outline the hat and face. Apply only a light pressure for thin lines which will give a more delicate look to your design.
Step 8: Final Touches
Outline the rest of Stitch’s body and add any background details you desire. Enhance your design with red glittery gel polish on certain areas of the outfit for a festive touch. Cure the final design thoroughly.
Conclusion
Creating Santa Stitch nail art is not only a fun project but also an excellent way to showcase your nail art skills. By following these detailed steps, you can create a unique festive look that is sure to impress. Remember to take your time and enjoy the creative process!
Tips for Success
- Practice: If you’re new to nail art, practice on a practice wheel before working on your nails.
- Quality Products: Use high-quality gel polishes for better results.
- Consistency: Make sure to cure each layer properly to avoid smudging.
With this tutorial, you’re all set to make your holiday nail art shine with a cute Santa Stitch design. Happy crafting!


