Introduction to Chrome Nails
Chrome nails are a timeless trend, captivating nail enthusiasts and professionals alike. They offer a stunning mirror-like finish that can elevate any manicure. In this guide, we’ll explore the essential techniques and tips for applying chrome nails, ensuring your mani looks flawless and lasts long.
The Importance of Chrome Powder Prep
Preparing the nails is crucial for achieving a perfect chrome finish. Start with a clean manicure, applying a base coat followed by two layers of a colored gel polish. This creates the ideal surface for the chrome powder.
A no-wipe topcoat is fundamental in the application process. This ensures a perfectly smooth surface free from bumps, which is paramount for the chrome powder to adhere smoothly. After applying the topcoat, cure it under a UV lamp for 15 to 30 seconds, adjusting the time based on your lamp’s strength.
Applying Chrome Powder
Once your topcoat is cured, it’s time to apply the chrome powder. Using a silicone applicator, gently buff the chrome powder onto your nails. After that, remove any excess powder with a soft brush. If some residue remains around the edges, lightly file them with a soft file. Finally, use a soft cotton pad to wipe down the nail plate gently, ensuring a clean application surface.
Troubleshooting Adherence Issues
Sometimes, you might encounter patchy adherence of the chrome powder. If this happens, it’s advisable to wipe the topcoat with alcohol prior to applying the powder. Allow the alcohol to evaporate completely before starting the powder application. Adjusting the drying time of your topcoat can also solve adherence issues.
While there are many tools available for chrome powder application, I personally favor the silicone applicator for its efficiency in achieving an even finish. An alternative is to use nitrile gloves during application, as they have a smooth elastic surface that mimics the silicone applicator for an even spread of the chrome powder.
Sealing Your Chrome Nails
Once the chrome powder is applied, sealing is crucial for durability. There are several techniques for sealing chrome nails:
- Base Coat Technique: Gently apply a brush loaded with base coat over the chrome without applying pressure. Ensure good coverage while sealing the edges, then cure under a UV lamp for 60 seconds. Finish with your favorite topcoat.
- No Thickening or Base Coat: Use a non-acid primer that leaves a sticky layer and gently apply it around the nail edges. Follow with a careful topcoat application and cure for 60 seconds.
- Alternative Approach: After sealing edges with a base coat, cure for 60 seconds, then apply the topcoat gently and cure again.
Creative Techniques for Chrome Application
Let’s dive into various techniques that can amplify your chrome nails:
Combining with Stained Glass Gel Polishes
One of my favorite combinations involves silver chrome and stained glass gel polishes. Start with a black gel polish base, apply a no-wipe topcoat, then illuminate it with silver chrome before sealing it with a thin layer of base. You can also incorporate stained glass gel polishes or marble inks to create unique, multicolored nail art.
Exploring Aurora Chrome
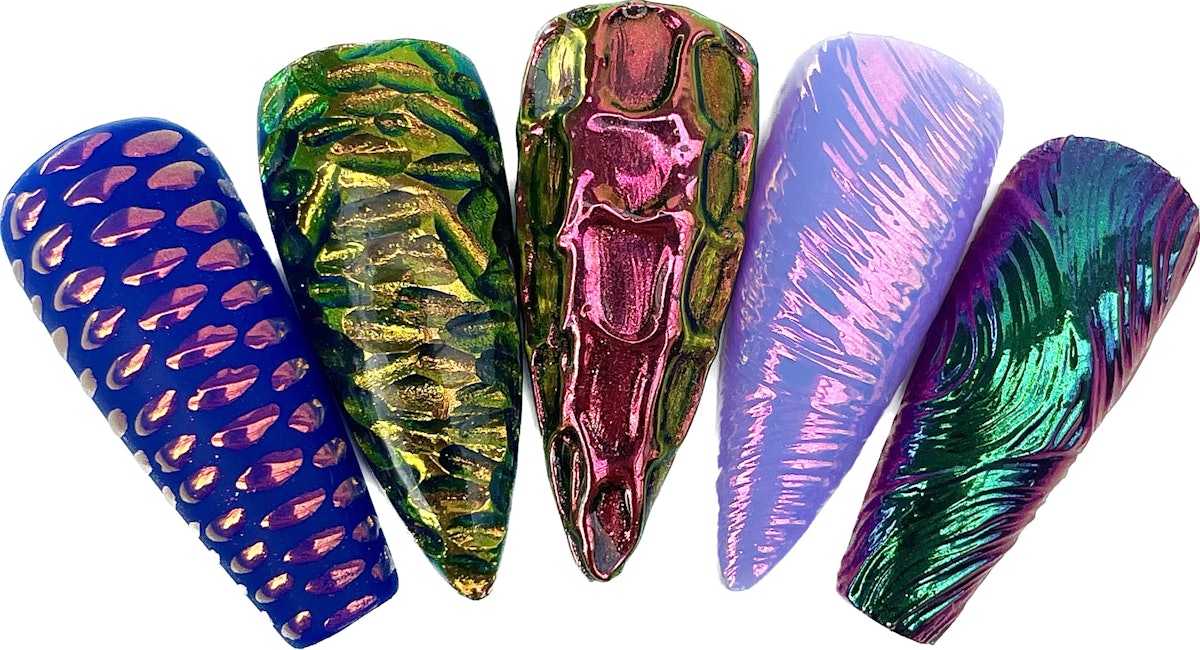
Aurora powders are another exciting option due to their color-shifting effects based on the base color. Apply a no-wipe topcoat followed by the Aurora powder for a stunning gradient effect that shifts with light.
Crafting 3D Chrome Nails
For a more textured and dynamic appearance, consider 3D chrome nails. Using 3D no-wipe gel, create the desired texture, followed by chrome powder application. If you lack 3D gel, any thick extension gel can work. Apply a thin no-wipe topcoat after curing the gel, then finish with chrome powder, sealing with a base and topcoat for a striking effect.
Conclusion
Mastering chrome nails can greatly enhance your nail artistry skills. With the proper preparation, application techniques, and sealing methods, you can achieve stunning chrome nails that not only look amazing but also last longer. Get creative with different styles and combinations, and don’t hesitate to experiment with new techniques. Happy nail painting!


