Introduction
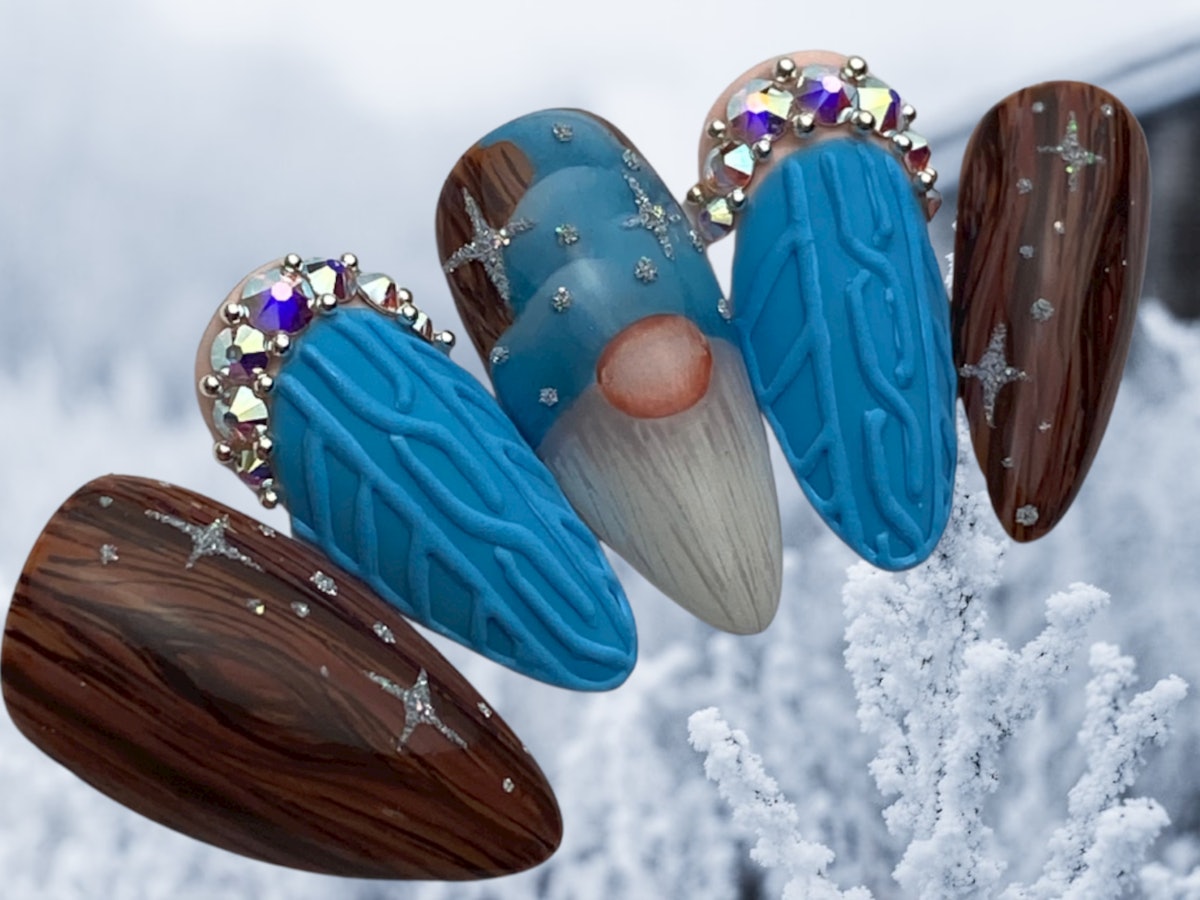
As the holiday season approaches, it’s time to bring some festive cheer to your nail art! There’s truly gnome place like home, and with the delightful gnome nail art created by nail educator Classic Nicole-Mully, you can embrace the spirit of the holidays right at your fingertips. This tutorial will guide you through creating a charming set of gnome-inspired nails that capture the essence of the season.
Materials Needed
Before you dive into the tutorial, ensure you have all the necessary materials ready:
- Base coat
- Gel or acrylic nail polish in bright colors
- White and red nail polish for the gnome
- Fine detail brushes
- Dotting tool
- Top coat with sparkle
- Nail decals or stickers (optional)
- Nail file and buffer
- Nail art sponges
Step-by-Step Detailed Tutorial
Step 1: Prepare Your Nails
Start by cleaning your nails and pushing back your cuticles. Buff the surface of your nails gently to create a smooth canvas. Apply a base coat to protect your natural nails and allow it to dry completely.
Step 2: Base Color Application
Choose a festive base color; you might go with a bright red or a cheerful green to set the mood for the gnome theme. Apply two coats for full coverage and allow each coat to dry before proceeding.
Step 3: Create the Gnome’s Face
Using a fine detail brush and white polish, paint a half-circle near the cuticle area to form the gnome’s hat. Then, with a different color, add more details like the tip of the hat and facial features, including a small nose in the center.
Step 4: Add Gnome Details
Next, add texture to your gnome’s hat. Use a dotting tool to create small dots or lines that mimic the texture of fabric. For the beard, you can use white polish with a fluffy brush to create a soft, textured look.
Step 5: Embellish with Sparkles
To reflect the holiday spirit, add some sparkles! Once your gnome is dry, apply a sparkle top coat over the entire nail or on selective areas to create a twinkling effect.
Step 6: Final Touches
If you want to add extra flair, include small wood details or decals. You may also choose to paint additional gnome figures on other nails for a complete festive look.
Step 7: Seal Everything with a Top Coat
Finally, seal all your hard work with a glossy top coat. This step will not only give your nails a beautiful finish but will also protect your artwork from chipping.
Care Tips for Your Holiday Nail Art
To keep your gnome nail art looking its best throughout the holiday season:
- Avoid soaking your nails in water for long durations.
- Avoid using your nails as tools to prevent chipping.
- Reapply top coat weekly to maintain shine and prevent wear.
Conclusion
Creating gnome nail art is a fun and engaging way to express your holiday spirit. With a little practice and creativity, you can adorn your nails with charming gnomes, sparkling finishes, and delightful colors. Don’t forget to share your designs and get inspired by others in the nail art community!
For the complete tutorial with step-by-step photos, check out Nailpro‘s November/December 2022 digital magazine.


