Balletcore: The New Nail Trend
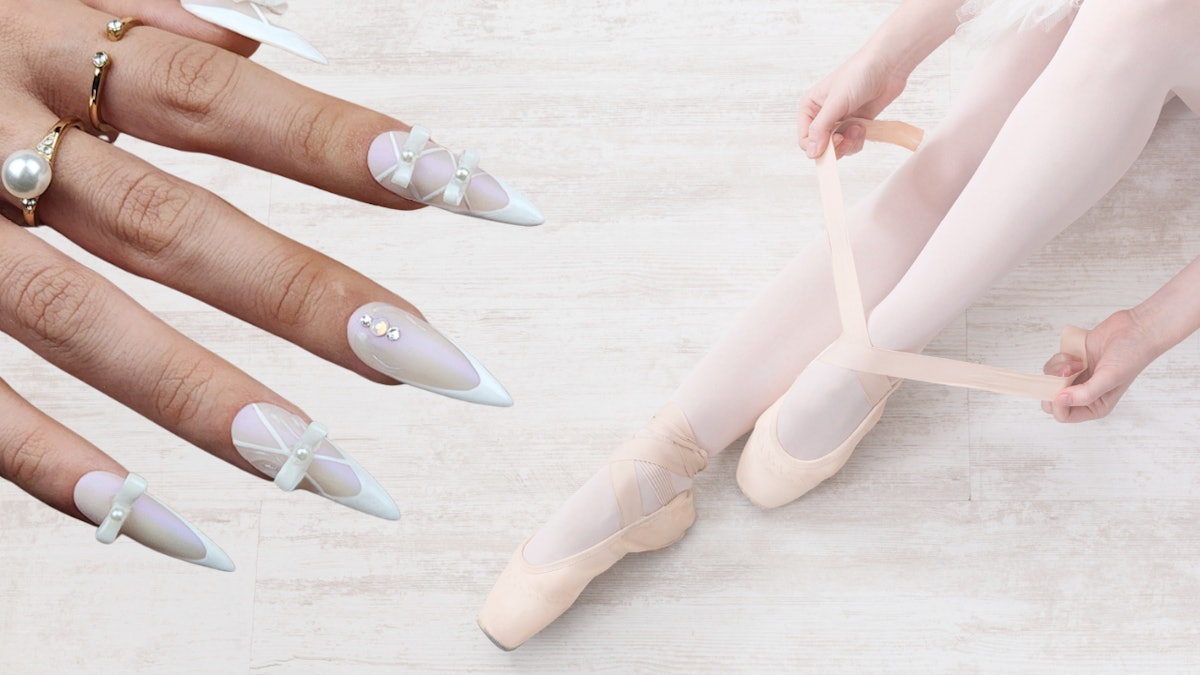
The latest minimalist nail look making waves in the industry is balletcore. Simply put, this trend takes the ballet pink we all know and love—a lovely peach/pink hybrid—and finds ways to amp it up. Balletcore is not just about colors; it embodies elegance, grace, and the clean aesthetic inspired by the world of ballet. With an emphasis on subtle sophistication, it resonates with those who appreciate minimalist beauty.
Why Choose Balletcore Nails?
Balletcore nails represent a lifestyle that prioritizes simplicity paired with elegance. They provide a perfect canvas for expressing creativity in a refined manner. Here are a few reasons why this trend is catching on:
- Timeless Aesthetic: The ballet pink color palette is timeless, making it suitable for all occasions.
- Versatile Design: Balletcore nails can be styled in various ways—from understated to intricate designs—offering flexibility in how you present your nails.
- Boosts Confidence: Beautifully manicured nails can significantly enhance your overall appearance and boost your self-esteem.
Getting Started: Essential Tools for Balletcore Nails
Before diving into the tutorials, it’s essential to gather the necessary tools to achieve the perfect balletcore nail design. Here’s what you’ll need:
- High-quality base coat
- Ballet pink nail polish
- Top coat for a glossy finish
- Nail art brushes
- Dotting tools
- Striping tape
- Optional: nail stickers or decals
Tutorial 1: Classic Ballet Pink Elegance
Step-by-Step Instructions
This classic design serves as the foundation of balletcore nails and is perfect for beginners.
- Prep Your Nails: Begin by filing and shaping your nails to your desired length and shape. Push back cuticles gently.
- Apply Base Coat: Apply a thin layer of base coat to protect your natural nails.
- Apply Ballet Pink Polish: Using a high-quality ballet pink nail polish, apply two coats for an opaque finish. Allow each coat to dry completely.
- Add a Shine: Seal your masterpiece with a top coat for a glossy, long-lasting finish.
- Finishing Touch: Optionally, add small nail stickers or decals for an extra touch of elegance, ensuring they complement the balletcore aesthetic.
Tips for Success
Take your time during each step for the best results. Don’t rush the drying process; this will ensure that your nails dry evenly and avoid smudging.
Tutorial 2: Balletcore with a Twist
Step-by-Step Instructions
This tutorial adds a unique twist to the classic ballet pink using a combination of nail art techniques to create a captivating design.
- Prepare Your Nails: As before, begin by prepping your nails: file, shape, and push back the cuticles.
- Base Coat: Apply a thin layer of base coat to protect your nails.
- Base Color: Paint your nails with two coats of ballet pink polish, allowing to dry between coats.
- Creating the Design: Using a striping tape, create elegant lines across your nails. You can choose to create geometric shapes or delicate patterns based on your preference.
- Add Contrast: With a contrasting color such as gold or white, fill in the spaces created by the striping tape. Carefully remove the tape to reveal sharp, clean lines.
- Top Coat: Finish with a top coat to lock in the design and add shine.
Final Thoughts
Both tutorials reflect the charm of balletcore nails while allowing for personal creativity. The balletcore trend shows how effective simple yet striking designs can be in nail art. Whether you prefer the elegance of the classic look or the modern twist, these designs are sure to impress.
As you experiment with these nail art ideas, remember that practice makes perfect. With a little patience and creativity, your nails can become a work of art that reflects your style and personality. Enjoy the process, and happy painting!


