Floral Summer Nails: A Step-by-Step Guide
As summer approaches, many of us look for fresh and vibrant ways to express our style. One of the most fun and creative ways to do this is through nail art. In this guide, we will walk you through the process of creating beautiful floral summer nails, inspired by the talented nail artist Jose Cordova, who’s known for his stunning artistry. Whether you’re preparing for a beach day or a picnic, this floral nail art is perfect for the season!
Meet the Artist: Jose Cordova
Jose Cordova, a Phoenix-based nail artist, started his journey in the world of nails as a teenager, inspired by his mother who had an innate passion for nail art. His skills blossomed over the years as he learned from magazines and tutorials while living in Mexico. Realizing his calling, he pursued a career in nail artistry. His signature style involves dynamic hand-painted designs, making him a sought-after artist in the nail community.
What You Will Need
- White nail polish for the base coat
- Colored gel polish for geometric shapes
- Black gel paint for outlines and flower silhouettes
- Clear gel polish for shading
- White polish for highlights
- Matte top coat
- Nail embellishments (optional)
- Nail art brushes
- Nail file and buffing block
Step-by-Step Instructions
Creating floral summer nails might seem daunting, but with a little practice and patience, you can achieve this stunning look. Follow these eight easy steps:
1. Start with a White Base
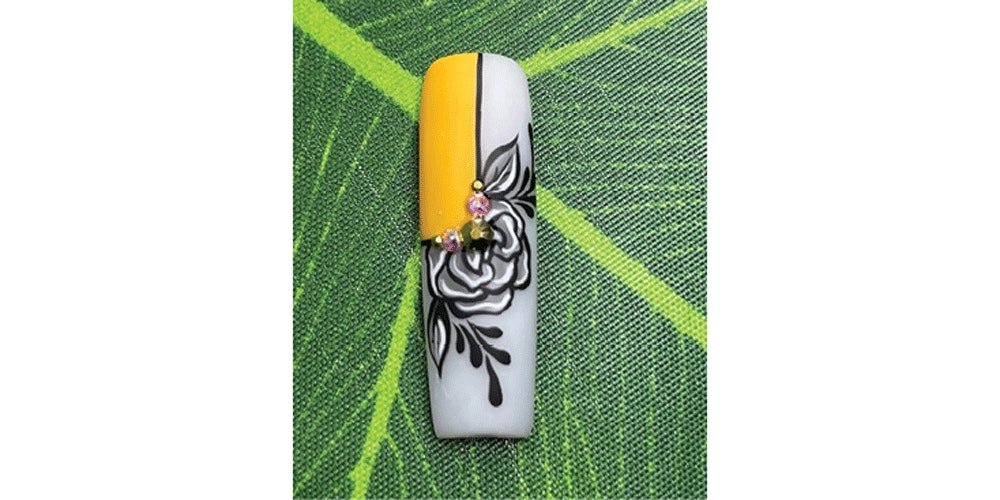
Begin your nail art by applying a white base coat to all your nails. This base will provide a clean canvas for the vibrant colors and will help them pop. Ensure each coat is dry before moving to the next step.
2. Add a Geometric Shape with a Pop of Color
Using a colored gel polish, create a fun geometric shape on your nails. This could be a triangle, square, or any shape that appeals to you. Make sure the color contrasts well with the white base.
3. Outline Your Shape in Black
Once the colored shape dries, outline it using black gel paint. This adds definition and makes the shape stand out more against the white backdrop.
4. Create the Silhouette of the Flowers
Using black gel paint again, carefully paint the silhouettes of flowers around the geometric shapes. You can opt for different flower styles to create a unique look. Ensure your strokes are smooth and precise for a professional finish.
5. Mix Clear and Black Gel Polish for Shading
To add depth to your floral designs, mix clear gel polish with black gel polish. Apply this mix inside the outlined flowers to create a shading effect, giving them a more three-dimensional look.
6. Add White for Highlights
To complete the flowers, add a touch of white paint to the petals for highlights. This will give your flowers a fresh, blooming appearance and make them pop even more.
7. Apply a Matte Top Coat
To seal your artwork and add a modern finish, apply a matte top coat to all your nails. This step is essential, as it not only protects your designs but also enhances their durability.
8. Add Embellishments
If you want to elevate your floral summer nails even further, consider adding some nail embellishments such as rhinestones, beads, or glitter. Use nail glue to secure them in place.
Conclusion
Now that you have completed your floral summer nails, get ready to show them off! This nail art design is perfect for any summer occasion, allowing you to express your creativity and personal style. Don’t forget to share your creations on social media, especially tagging talented artists like Jose Cordova for more inspiration!
For more intricate designs and nail care tips, check out the latest issue of Nailpro, where you can also find a step-by-step visual guide for this floral summer nails tutorial.
Happy nail painting!


