Introduction to CND™ Plexigel™
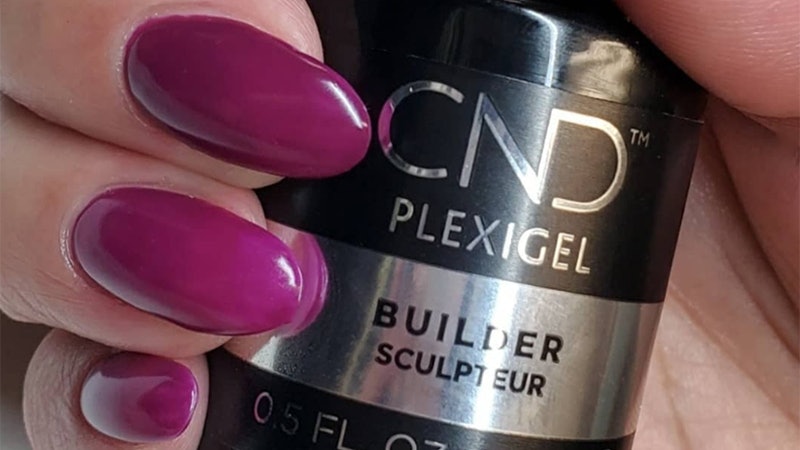
CND™ Plexigel™ is revolutionizing the nail enhancement industry with its innovative brush-in-a-bottle system. It eliminates the hassle of using pots, tubes, and mixers, making the application process clean and mess-free. Ideal for nail professionals at all levels, the Plexigel™ system promises over three weeks of durability, offering strength, length, and shape while ensuring a crystal-clear finish.
The Plexigel™ System Breakdown
The CND™ Plexigel™ system comprises four essential products designed for seamless and effective application:
Bonder
The Bonder serves as the foundation, ensuring that the gel adheres effectively to the natural nail.
Builder
The Builder provides essential strength and architecture, allowing nail techs to create moderate to long nail lengths that look natural and polished.
Shaper
CND™ Plexigel™ Shaper acts as a lightweight protective layer that refines the surface and fortifies natural nails.
Top Coat
Finally, the Top Coat seals the look, giving it that essential glossy finish while protecting against chips and scratches.
Why Rebalance CND™ Plexigel™?
Regular rebalancing of CND™ Plexigel™ is essential to maintain the integrity and appearance of the nails. As nails grow, the product can shift, and rebalancing allows techs to ensure they remain aesthetically pleasing and structurally sound. This process is simplified by the Plexigel™ system, which significantly reduces filing and rebalancing time by up to 50%, making it feasible to complete in under 30 minutes.
The 5 Steps to Rebalancing CND™ Plexigel™
To effectively rebalance CND™ Plexigel™, follow these five simple steps:
Step 1: Assess the Condition
Begin by evaluating the nails to identify areas that require attention. Look for any lifting or gaps between the product and the natural nail that could lead to moisture infiltration.
Step 2: Prepare the Nails
Gently file the top surface of the Plexigel™ to remove shine. This preparation step ensures better adhesion for the rebalancing process.
Step 3: Apply Bonder
Use the Bonder to create an optimal base for the new layer of Plexigel™. A thin layer should be applied directly to the prepared nail surface.
Step 4: Reapply Builder and Shaper
Following the application of Bonder, use the Builder product to reinforce the nail structure. Depending on the length desired, you may need to sculpt and shape the gel product properly. After the Builder, apply a layer of Shaper to refine the surface.
Step 5: Finish with Top Coat
Seal your work with the Top Coat to add shine and protect against wear and tear. Allow proper curing under the UV/LED lamp as directed.
Watch and Learn with Kayleigh Cabral
To make the process even easier, join CND™ educator and salon owner Kayleigh Cabral in a quick instructional video. This resource will guide you through each step visually, reinforcing the techniques needed for successful rebalancing.
Exclusive Offer for Nail Professionals
Don’t miss your chance to enhance your skills! Fill out the form and get access to the how-to video. Plus, you’ll be entered to win an exclusive CND™ Plexigel™ System Kit, courtesy of PinkPro Beauty Supply!
PinkPro Beauty Supply: Your Professional Beauty Source
PinkPro Beauty is dedicated to providing beauty professionals with the highest quality products. Their online store carries an extensive range of nail supplies, including the CND™ Plexigel™ lineup. With a commitment to fulfillment speed and customer service, PinkPro ensures licensed techs have access to exclusive deals, including 25% off your first order and free shipping on orders over $75.
Final Thoughts
Rebalancing CND™ Plexigel™ is a vital service that can be completed efficiently with just five steps. By mastering this skill, nail professionals can offer clients the best in nail care while enhancing their own salon’s reputation for quality and reliability.


