Celebrating Pride Month with Colorful Nail Art
Every June, the world comes together to celebrate Pride Month, honoring the LGBTQIA+ community and its rich history, such as the iconic Stonewall Uprising of 1969. This vibrant month is a perfect opportunity to embrace love, allyship, and creativity through stunning nail art that showcases the beauty of the rainbow. Whether you’re looking to express your support or simply enjoy a colorful aesthetic, these three rainbow nail tutorials will help you create breathtaking designs that shine.
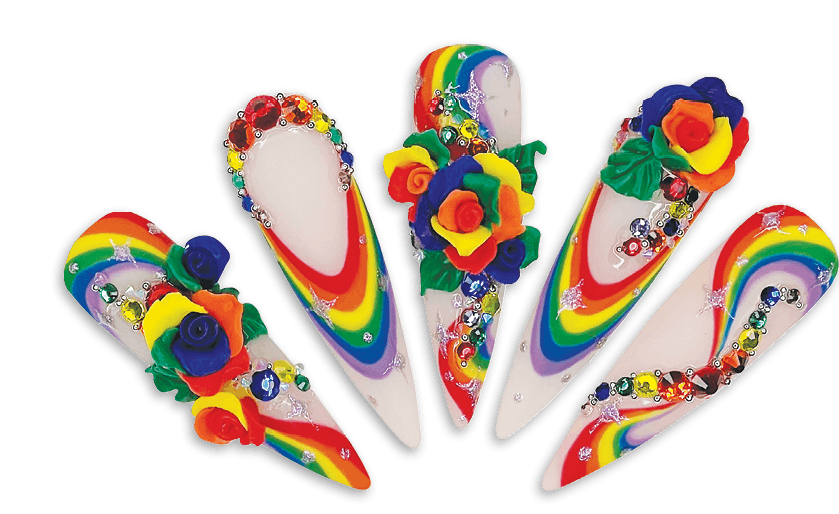
1. Half Rainbow French with Rainbow Rose Detail
This elegant yet fun nail design combines the classic French manicure with a dazzling rainbow twist. Perfect for anyone wanting to celebrate pride with a touch of sophistication!
Materials Needed:
- Nude or pink gel polish
- Rainbow gel polish
- Matte top coat
- Glitter gel polish
- Dotting tool
- 3D carving gel
- Silicone brush
- Crystal glue
- Crystals, caviar beads, and pixie crystals for embellishment
Instructions:
- Start by applying two coats of your nude or pink gel polish and cure each layer.
- Using a rainbow gel polish, create the French tip design, curing after each color to keep the lines clean.
- Finish with a matte top coat and cure.
- Next, with glitter gel polish, add playful dots using a dotting tool. Use a thin detail brush to create tiny stars, then cure again.
- For the 3D rose, apply a base coat, and then use the 3D carving gel with a silicone brush to mold the petals. Cure to set.
- Add crystal glue to your design and embellish it with crystals, caviar beads, and pixie crystals, then cure to finalize the look.
2. Rainbow Swirls Detail
For a design that embodies fluidity and vibrancy, the Rainbow Swirls are ideal. This nail art creates a mesmerizing swirl effect that is both stylish and celebratory!
Materials Needed:
- Red gel polish
- Rainbow gel polish
- Matte top coat
- Glitter gel
- Dotting tool
- Crystal glue
- Red crystals and silver caviar beads
Instructions:
- Using a long detail brush, create a swirling line with red gel polish. Cure the design.
- Continue with various colors in a rainbow pattern, ensuring to cure between layers for crisp lines. Finish with a matte top coat and cure.
- Add glitter gel and use a dotting tool to create whimsical dots. Utilize a thin brush to add stars, then cure again.
- To complete the look, center a red crystal with adhesive and create rainbow patterns on either side using more crystals and add silver caviar beads in between. Cure to secure everything.
3. Rainbow Swirls with Rainbow Roses Detail
This intricate design combines the swirling rainbow pattern with elegant 3D roses, making it perfect for those looking to stand out this Pride Month!
Materials Needed:
- Similar materials as above
Instructions:
- Create the same rainbow swirl effect as described in the previous tutorial. Finish with a matte top coat and cure.
- For the 3D rose, follow the same carving gel instructions as before. Apply base coat, mold the petals, and cure.
- Add glitter dots, and with a small detail brush, create stars, ensuring to cure each layer.
- Complete by adding more crystals, caviar beads, and pixie crystals to enhance the overall design.
Conclusion
These three rainbow nail tutorials celebrate LGBTQIA+ pride while allowing for personal expression through art. They are perfect for Pride Month and can be worn throughout the year to demonstrate your support, creativity, and love for diversity. Gather your supplies, unleash your imagination, and let your nails bloom with color and pride!


