Celebrate Star Wars Day with Style
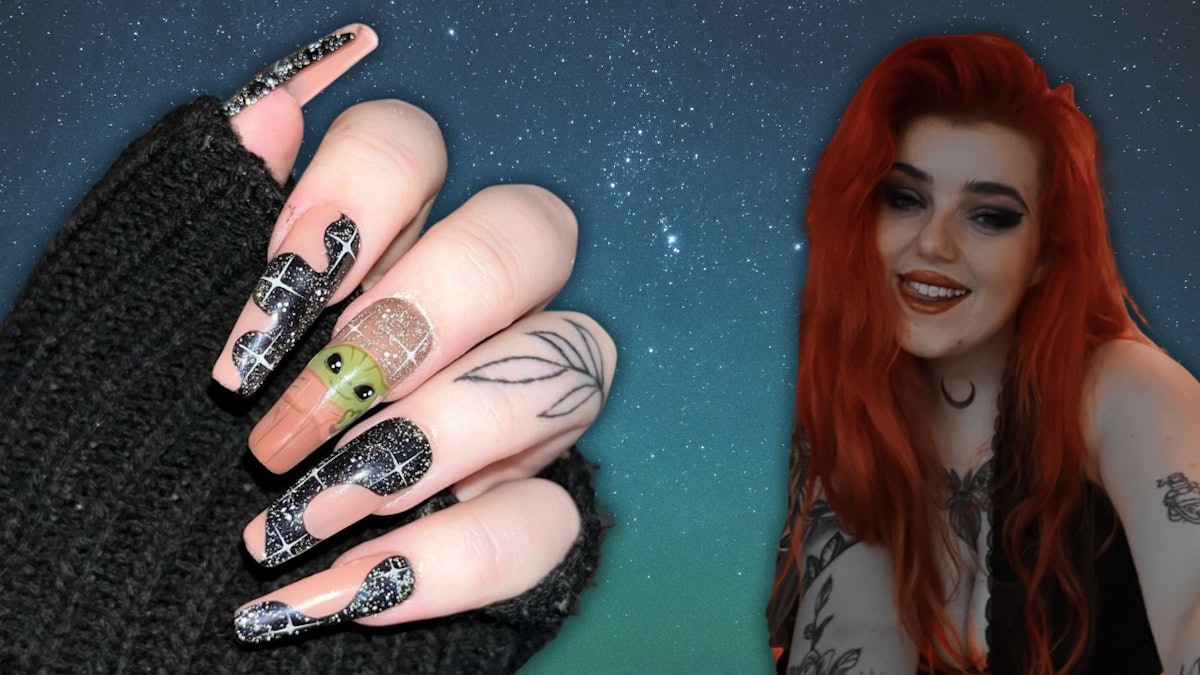
If you’re a geek or a nerd, May 4 is likely one of your favorite days of the year. Why, you ask? Well, it’s Star Wars Day! This day is a celebration for fans of the epic saga and is a perfect opportunity to show off your love for the franchise. One fun way to do this is by creating your own Star Wars-themed nail art, specifically a Grogu (Baby Yoda) nail tutorial. This sleek design will let your passion for Star Wars shine through!
Gather Your Supplies
Before you dive into this fabulous Grogu nail tutorial, you’ll need to gather some supplies. Here’s what you’ll need:
- Nail polish in shades of green, brown, beige, black, and white.
- Nail art brushes for fine detailing.
- Topcoat for sealing the design.
- Nail file and buffer.
- Base coat for better adhesion.
- Optional: nail decals or stickers featuring Star Wars motifs.
Step-by-Step Grogu Nail Tutorial
Step 1: Prepare Your Nails
Start by removing any old nail polish and shaping your nails using a file. Buff the surface slightly to ensure that the polish adheres better. Apply a base coat to each nail and let it dry completely to create a smooth canvas for your Grogu design.
Step 2: Base Color Application
Once the base coat is dried, pick a soft green polish as your base color. Apply two coats of this polish on your nails, ensuring that each coat is fully dry before applying the next one. This will create a perfect backdrop for your Grogu design.
Step 3: Create Grogu’s Face
To draw Grogu’s face, use a fine nail art brush and black polish. Carefully outline two large oval shapes for the eyes, leaving a small white space inside each eye for the light reflection effect. Fill in the pupils with black polish and let them dry. Use a beige or light brown polish to create his ears on either side of the face design. Add depth by using a slightly darker shade of brown for the inner parts of the ears.
Step 4: Add Details
Now it’s time to make Grogu look extra adorable! Using white polish and a fine brush, add small dots above the eyes for added cuteness. To bring life to his expression, create a small, happy mouth. If you want to go the extra mile, you can also paint tiny robes using beige/brown colors around his head. This will add to the overall character appeal!
Step 5: Seal the Design
Once you are satisfied with the Grogu design, allow it to dry completely. Apply a top coat to seal and protect your artwork. This will not only add shine but also ensure that it lasts longer throughout your Star Wars Day celebrations!
Bonus Tips for a Successful Nail Tutorial
Practice Patience
Creating intricate nail art designs can take some practice. Don’t rush the process; take your time to achieve the best result. If necessary, you can use nail polish remover to correct any mistakes.
Get Creative
While this tutorial focuses on Grogu, feel free to add your own spin! Consider mixing in other Star Wars characters, symbols, or even a galaxy-themed nail or two.
Social Media Inspiration
Before and after you create your nail art, don’t forget to take fun photos and share them on social media using #StarWarsNails or #GroguNails! Get inspired by other Star Wars fans and nail artists who celebrate May 4th in style.
Conclusion
With this Grogu Star Wars nail tutorial, you can easily bring a piece of the Star Wars galaxy to your fingertips. Perfect for May 4 celebrations, this design is sure to impress fellow fans and remind everyone of the beloved character, Grogu. May the force be with your nails!


