Introduction
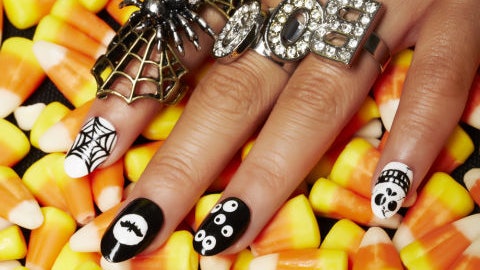
With the temperatures dropping and the leaves falling, spooky season will be upon us before we know it! Bellacures is here to help you get your clients ready for the changing season with three stunning Halloween nail tutorials. Whether your clients want a blood-dripping design, a cute ghost-inspired look, or a creepy spider theme, we’ve got you covered. Let’s dive in!
BLOODY FRENCH TIPS
Want to take a STAB at this look? This blood-drip red manicure is sure to be a fan favorite this Halloween season.
Materials Needed:
- Opaque nude polish
- Dark red polish
- Dotting tool
- Thin line brush
- Top coat
Steps:
- Begin with cuticle care and file the nails into your desired shape.
- Apply one coat of opaque nude polish to the base of the nails, choosing a shade that complements your client’s skin tone.
- Using a dotting tool, place dark red dots toward the middle of the nail bed. These dots will indicate where the blood drips will end.
- Next, use a thin line brush to drag excess polish up the nail from each dot, creating unique drip shapes.
- Connect the blood drips at the tips of the nails for a cohesive look.
- Fill in any gaps with additional dark red polish.
- Finish with a top coat for a glossy effect!
SPOOKY GHOST MANI
Looking for a nail look that will send shivers up your spine this spooky season? This hauntingly boo-tiful ghost mani is sure to do the trick!
Materials Needed:
- Nude polish
- White polish
- Black polish
- Thin line brush
- Dotting tool
- Top coat
- Cuticle oil
Steps:
- Begin with cuticle care and file the nails into a rounded oval shape.
- Apply two coats of nude polish that matches your client’s skin tone, allowing for proper drying time between each coat.
- Take white polish on a thin line brush to outline the ghost shape on one side of the nail bed, starting thin at the tip and widening toward the nail bed.
- Fill in the outline with white polish for a bright ghost design.
- Using a dotting tool, add two black dots for the ghost’s eyes.
- Finish off with a top coat and cuticle oil for maximum shine!
SPIDER MANI
This wicked spider mani is absolutely to DIE for!
Materials Needed:
- Black polish
- White polish
- Thin line brush
- Dotting tool
- Top coat
- Cuticle oil
Steps:
- Start by completing cuticle care and filing the nails into a squared shape.
- Apply two coats of black polish to each nail, ensuring proper drying time to prevent smudging.
- On the ring finger, use a dotting tool to create a large white dot for the spider’s body with a smaller dot for the head.
- Use a thin line brush to draw spider legs from the body dot to create a creepy crawly look. Add black eyes if you wish!
- For an extra flair, consider adding glitter or gems to enhance the design.
- Finish with a top coat and cuticle oil to keep your nails hydrated and prevent chipping.
Conclusion
Get creative this Halloween with these fun and spooky nail tutorials from Bellacures. Whether you’re going for a bloody, ghostly, or creepy spider look, your clients will love these seasonal styles. Don’t forget to check out Bellacures on Instagram and their website for more nail inspiration!


