Introduction
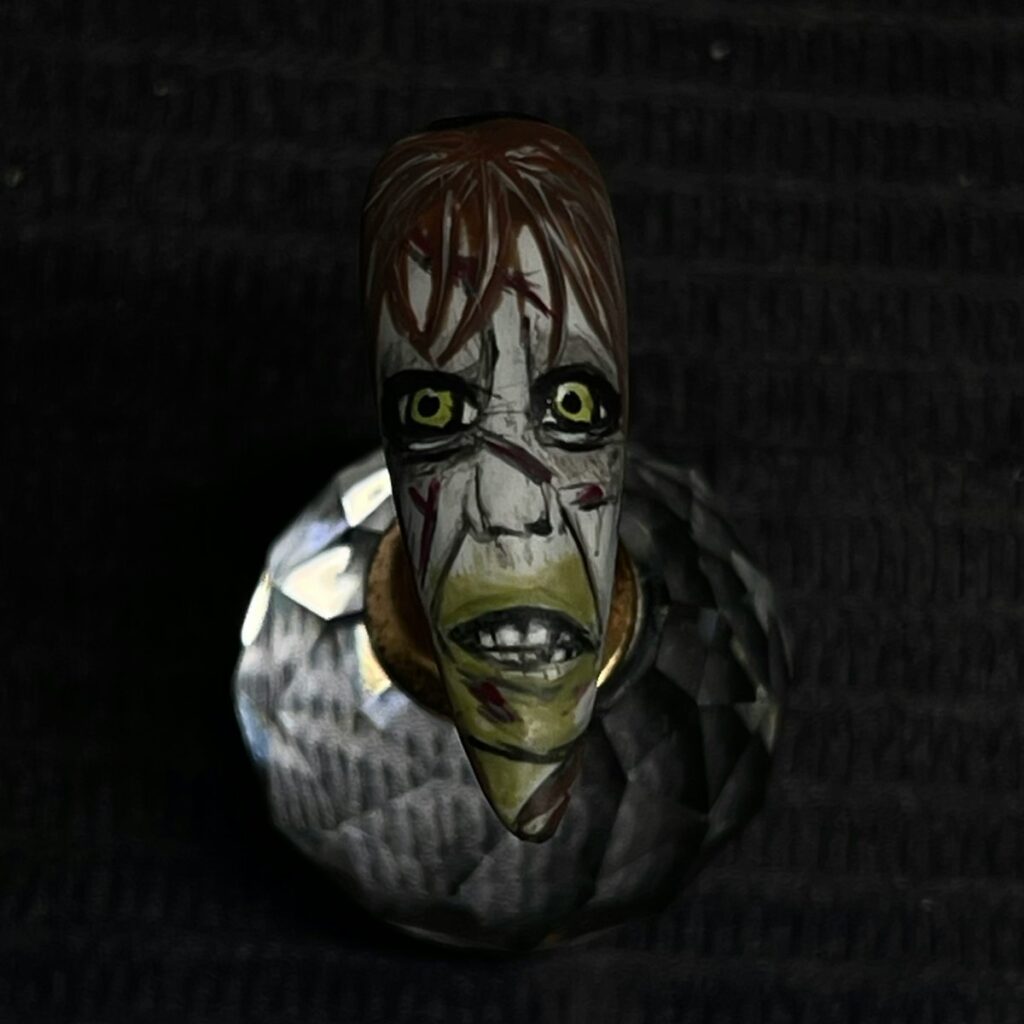
The Halloween season brings out creativity in many areas, and nail designs are no exception. This year, go beyond the ordinary and dive into a chilling yet beautiful design inspired by one of horror’s most iconic characters, Regan from ‘The Exorcist’. This detailed tutorial by Yatzy M.C, a professional nail technician based in Orlando, Florida, guides you step-by-step through the nail art process.
Step-by-Step Tutorial for Regan Nail Art
Follow these steps closely to achieve a spooky yet stunning result.
Step 1: Base Coat
Begin by painting the entire nail with a jet black gel polish. This dark base will enhance the contrast with the subsequent white details. Cure the polish under the UV lamp for 30 seconds.
Step 2: Create the Cross
Using white gel polish, draw a horizontal line and a vertical line resembling the letter ‘T’ or a cross in the center of the nail.
Step 3: Outline the Cross
Next, draw an oval shape around the cross you just created using the same white gel polish for a more detailed effect.
Step 4: Fill the Oval
Fill the entire oval with more white gel polish and cure for 30 seconds.
Step 5: Add Shading
Without curing, use a shading gel to draw a letter ‘Y’ inside the oval along with a horizontal and vertical line for more depth.
Step 6: Draw the Eyes
With a white gel polish, outline the white parts for Regan’s eyes, ensuring they are symmetrical. Cure for 30 seconds.
Step 7: Define the Nose
To shape Regan’s nose, utilize the shading gel again. With a flat brush dipped in acetone, remove any excess shading gel from the earlier step.
Step 8: Highlight Features
Highlight around the eyes and nose using black gel for a more dramatic look. Cure for 60 seconds.
Step 9: Add Shadows
Lightly dab black gel around the eyes using an ombré brush to create depth. Cure for another 60 seconds.
Step 10: Center the Eyes
Utilizing a dotting tool, place a dot of light green polish in the center of each eye. Cure for 30 seconds.
Step 11: Draw the Mouth
Form Regan’s mouth by drawing two lines going downward for her smile. Use the shading gel for a realistic effect. Cure for 30 seconds.
Step 12: Add Pupils
With your dotting tool, carefully place a black dot in the center of her eyes to create the pupils.
Step 13: Shape the Teeth
Use a fine brush to draw Regan’s teeth, aiming for a rotting look for that extra horror effect.
Step 14: Add Scars
Utilize the shading gel once more to create various scars across Regan’s face, ensuring they look realistic as you layer them.
Step 15: Depth to Scars
To make the scars more prominent, use a darker shade of black to highlight them. Aim for realism in your strokes.
Step 16: Bloody Details
Using a dark red gel polish, create bloody patches on the scars to emphasize the horror theme.
Step 17: Hair Effects
Using different shades of brown, draw strands of hair around Regan’s face for a completed look.
Step 18: Puke Detail
With the same light green gel used for the eyes, dab around her mouth to mimic vomit. Cure for another 30 seconds.
Step 19: Final Details
Add extra lining around the nose to create a scrunched effect. Cure for 60 seconds.
Step 20: Topcoat
Finish your nail art by applying a matte topcoat, curing for 60 seconds, and wiping off any shiny residue with alcohol for a polished finish.
Conclusion
And there you have it! With patience and creativity, you can master the spooky Regan nail art that’s bound to make a statement this Halloween. Thanks to Yatzy M.C for this wonderful tutorial! Unleash your inner artist and enjoy the chilling excitement of Halloween with these hauntingly beautiful nails.

