Introduction
The holiday season is upon us, and what better way to celebrate than with stunning nail designs that capture the festive spirit? Celebrity manicurist Jini Lim has crafted two eye-catching nail art looks using the Essie Northern Lights inspired Winter 2018 collection. These quick and easy designs are perfect for clients on-the-go or those looking to add some holiday cheer to their manicures. Let’s dive into the step-by-step guide for creating these dazzling holiday nail looks!
1. Holiday Cheer Look
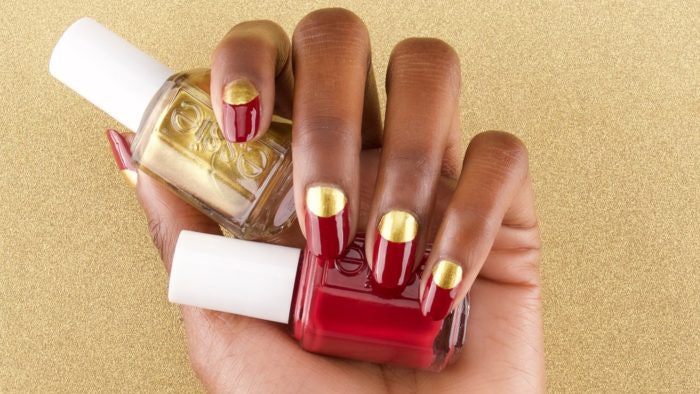
This vibrant look incorporates classic holiday colors and a sparkling finish, making it a festive favorite.
Step 1: Prepare Your Nails
Begin with a clean nail. Apply a thin layer of the Here to Stay Base Coat to protect and prepare the nail surface for color application.
Step 2: Apply Base Color
Next, apply two coats of Million Mile Hues on each nail. This metallic shade will provide a stunning backdrop for the next steps.
Step 3: Create the Half-Moon Design
Using Hear Me Aurora, paint the free edge of the nail while leaving a half-moon shape at the base. This unique design element adds flair and sophistication to the final look.
Step 4: Seal It In
Finally, seal your design with the Speed Setter Top Coat to ensure your festive nails last throughout the holiday celebrations.
2. Starry Winter Night Look
This enchanting design brings the magic of a starry winter night to your nails, perfect for evening parties and gatherings.
Step 1: Apply Base Coat
Just like the previous design, start with a clean nail and apply a thin layer of the Here to Stay Base Coat.
Step 2: Add the Base Color
Apply two coats of Sights on Nightlights on each nail. This rich purple color evokes a winter night filled with twinkling stars.
Step 3: Create Star Shapes
Using a thin liner tool, alternate between the tips of your nails and the bases (on every other nail) to outline star shapes. Fill in the star outlines with Million Mile Hues to give the stars a shiny glow.
Step 4: Finish with Top Coat
Seal your masterpiece with the Speed Setter Top Coat to lock in your festive design and add an extra layer of shine.
Conclusion
With just a few simple steps, you can create beautiful holiday nail looks that will impress your clients and spread festive cheer. Whether you choose the vibrant Holiday Cheer Look or the whimsical Starry Winter Night Look, both designs are sure to elevate any holiday outfit. Celebrate the spirit of the season with these stunning nail inspirations from Jini Lim and let your creativity shine this holiday season!

