Introduction
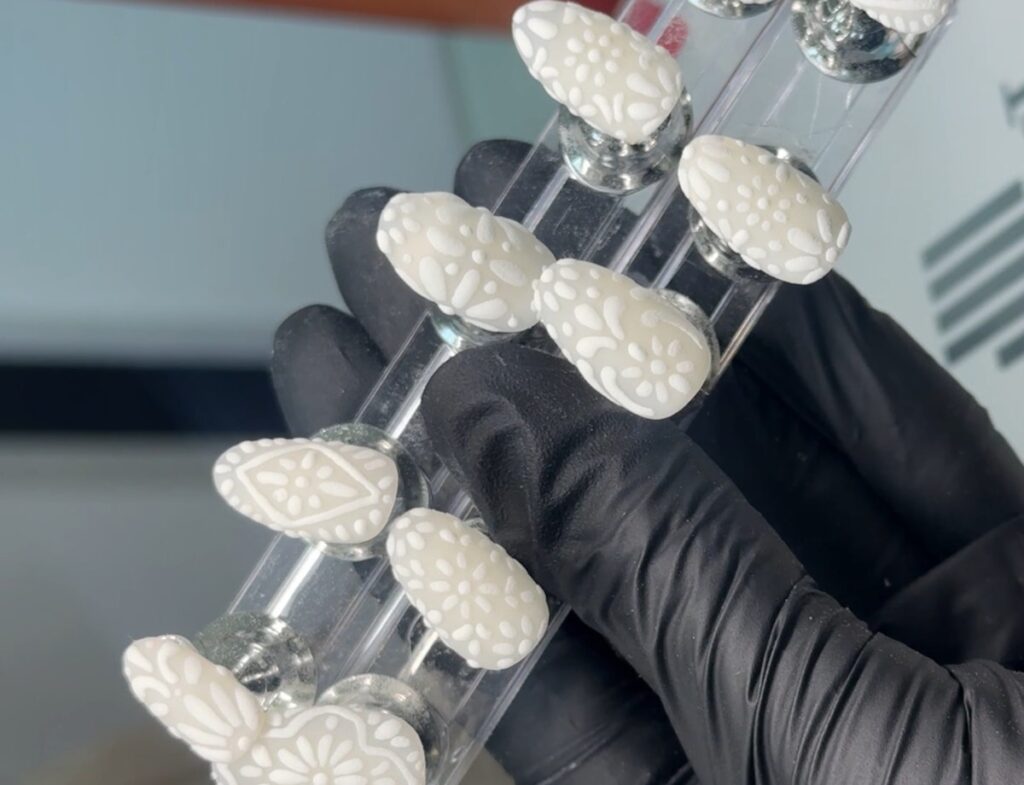
Nail art has taken the beauty world by storm, with creative designs capturing the hearts of many. One of the most stunning styles emerging from this trend is the Mexican Talavera nail design, characterized by intricate patterns and vibrant colors. In this tutorial, nail artist Miish Quiroz shares her step-by-step process for creating a beautiful set of press-on nails inspired by the traditional art of Talavera pottery. This design not only showcases artistry but also embraces the rich cultural heritage of Mexico.
The nail design was recently flaunted by British model Iskra Lawrence for her Saltair campaign, where she promoted her new Lip Oil Balms. Lawrence’s request for a unique yet versatile nail design allowed Quiroz to showcase her creativity while paying homage to the artistry of her homeland.
Understanding Talavera Art
Talavera pottery is famous for its beautiful, hand-painted designs, often featuring vibrant blues and whites that stand out in any setting. This traditional craft is deeply rooted in Mexican culture and symbolizes the creativity and skill of local artisans. Quiroz aimed to embody these values in her nail design by choosing lighter colors that complement various outfits while still paying tribute to the rich cultural heritage of Talavera.
Preparing for Your Talavera Nail Design
Materials Needed
- Press-on nail tips
- Nail primer or bonder
- Base coat
- Nail polish (ivory and white)
- Matte top coat
- Gel paint
- Clear acrylic powder
- Nail cleanser or alcohol
- Nail stand and dust brush
Step-by-Step Tutorial
Follow these steps to recreate the stunning Mexican Talavera nail design with a velvet effect:
Step 1: Prepare Your Tips
Start by selecting press-on nail tips that match the desired size and shape. Buff each tip to remove any shine, ensuring better adhesion. Apply mounting putty to your nail stand and carefully press the tips into place. Then, apply a coat of primer or bonder to enhance adhesion.
Step 2: Apply Base Coat
Next, apply a thin layer of base coat over the nails. This base layer ensures that your press-on nails remain durable for multiple uses. Cure each layer according to the product instructions.
Step 3: Apply Color
Choose your favorite color to create the base of your design. In this instance, Quiroz opted for two coats of an ivory polish. Make sure to cure each layer for 30 seconds to ensure proper drying.
Step 4: Add Matte Top Coat
After applying the base color, add one coat of matte top coat for a sleek finish. Cure for 60 seconds, followed by cleansing the nails with nail cleanser or 90% alcohol to prepare for the design.
Step 5: Create the Talavera Design
For this step, select a contrasting color for your design; Quiroz used white gel paint for a striking effect. Gel paint is ideal for detailed designs due to its thick consistency, allowing for better control without bleeding.
Step 6: Apply Acrylic for Texture
Before curing your designs, apply clear acrylic gently on top. This step is essential to create the unique velvet effect characteristic of the Talavera style. Cure the nails for 30 seconds to set the acrylic.
Step 7: Clean the Nails
Once cured, use a plastic dust brush and 90% alcohol to clean the surfaces of the nails, removing any leftover acrylic material.
Step 8: Final Touches
Carefully remove the nails from the stand and clean the backs with alcohol to ensure they are ready for application.
Step 9: Packaging
Finally, package the completed set of nails for your client. Whether for personal use or as a unique gift, these Talavera-inspired nails are sure to impress.
Conclusion
Creating a Mexican Talavera nail design is a fantastic way to explore cultural artistry while expressing personal style. With the velvet effect and intricate patterns, your nails will stand out beautifully. Follow the steps outlined in this tutorial to bring the stunning Talavera art to your fingertips, combining a rich heritage with modern beauty trends!

