Introduction
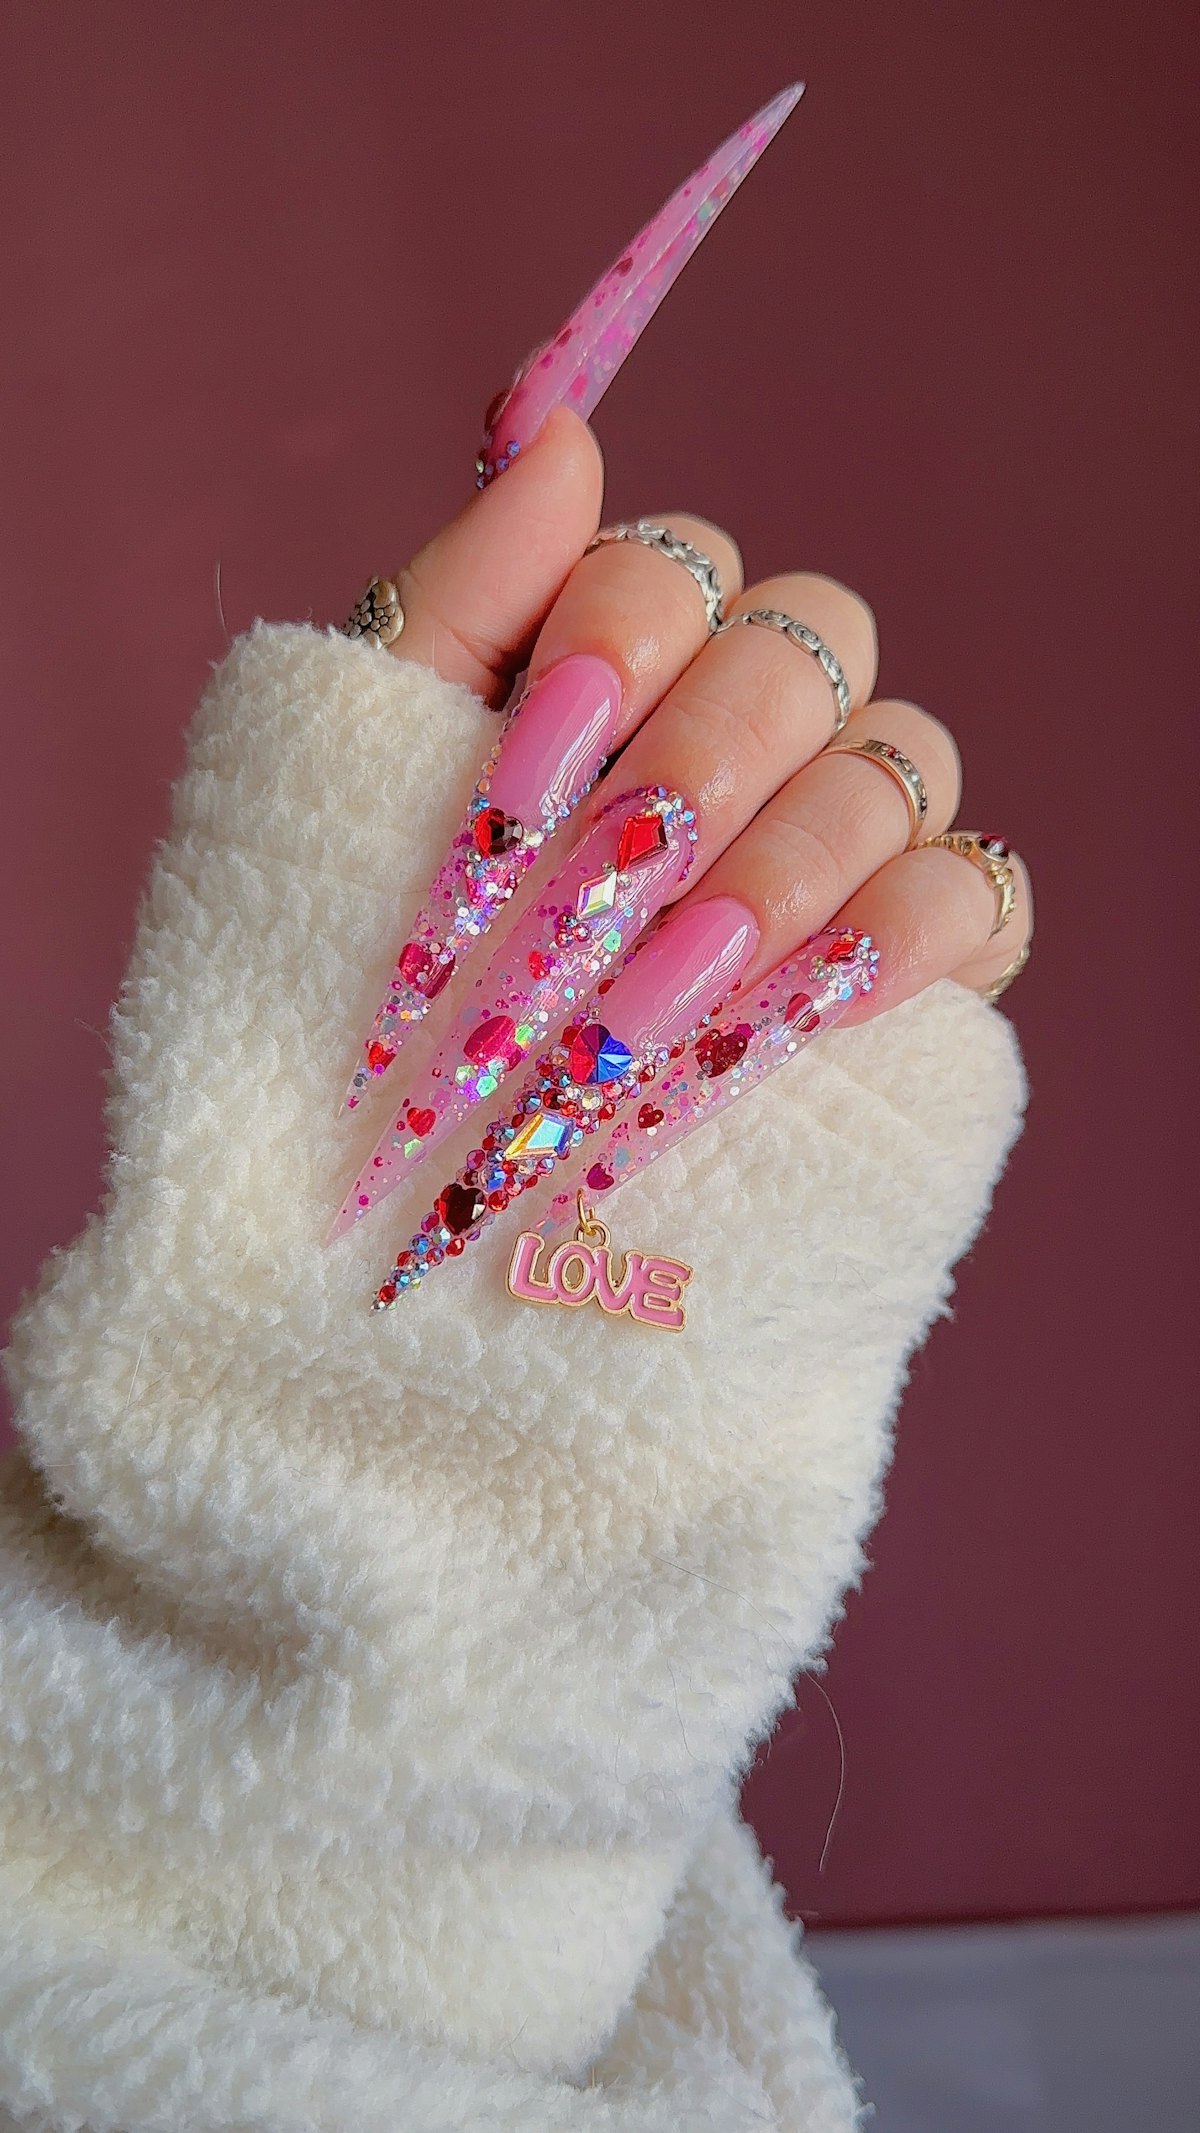
Welcome to this comprehensive tutorial on creating beautiful ‘Stuck in Love’ nail art, inspired by the love-filled atmosphere of Valentine’s Day! Lindsay Walters, a talented nail influencer with years of experience, will guide you through each step of the process, ensuring your nails are as fabulous as they are festive. By the end of this guide, you’ll have a stunning set of nails that you can’t wait to show off.
Products Used
To achieve the ‘Stuck in Love’ design, you’ll need the following products:
- Ana Does Nails “Love Bomb” Glitter Acrylic
- Tones Clear Acrylic to encapsulate the glitter
- Kiara Sky “Dark Pink” All-in-One Powder for the base color
- Madam Glam No Wipe Top Coat
- Makartt Rhinestone Glue to secure the rhinestones
Step-by-Step Nail Tutorial
Step 1: Nail Preparation
Proper preparation is crucial for a long-lasting acrylic application. Start by prepping the natural nails using Babe Nails Nail Prep Dehydrator and Mega Bond for the ultimate adherence.
Step 2: Apply Color and Glitter Acrylic
Next, let’s dive into the application process. Each nail features a different technique, as outlined below:
- Thumb Glitter Ombre: Begin with the dark pink acrylic at the tip, dragging it lightly towards the nail tip. Build the apex and fill the cuticle area, using less product as you move down for a seamless ombre. Follow up with the ‘Love Bomb’ glitter, filling the clear tip and dragging small pieces of glitter closer to the cuticle.
- Pointer Acrylic French: Apply a bead of acrylic where the tip meets the natural nail and drag to form a wide U-shaped French tip. Shape the apex and, if necessary, file for symmetry. Lastly, fill in the tip with glitter acrylic.
- Middle Glitter Ombre: Coat the entire nail with dark pink acrylic, keeping it thin where it meets the tip. Then, apply the glitter over the extended tip, ensuring only small pieces drag up for a flawless finish.
- Ring Dark Pink: This nail is a full canvas of dark pink – simply apply as desired, without encapsulation.
- Pinky Glitter Ombre: Repeat the technique used for the middle finger.
Step 3: Encapsulation
Ensure durability by encapsulating the thumb, pointer, middle, and pinky with clear acrylic. Shape the nails and build the apex as necessary.
Step 4: Filing and Shaping
File and shape the nails carefully, paying special attention to sealing the cuticle area for a flawless finish. You may also choose to create a hole in the pinky nail for a custom charm attachment.
Step 5: Rhinestone Application
The addition of rhinestones takes your design to the next level! Depending on your desired look, here are two methods:
- For intentional placements: Dispense a small amount of glue on a plate. Use tweezers to dip the flat side of the rhinestones into glue before adhering them to your nails. Cure under a lamp for 30 seconds.
- For French tips: Outline the French tip with larger rhinestones first, curing before adding smaller ones. Finish with a coating of rhinestone glue over the French tip before placing additional rhinestones.
Step 6: Top Coat Application
Apply a top coat to all nails, carefully avoiding the rhinestones to keep their sparkle intact.
Step 7: Optional Charm Attachment
If desired, select a charm and a loop connector to attach through the hole in the pinky nail for an extra special touch.
Step 8: Final Touches
Finish up your nails by applying cuticle oil for hydration and a polished look. Now you’re ready to dazzle the world with your stunning new set!
About Lindsay Walters
Lindsay Walters is a 26-year-old nail influencer based in Atlanta, Georgia, sharing her passion for nails alongside her two senior cats, Sushi and Tybee. Starting her career at 18 with a gel nail lamp gift from her mom, Lindsay is dedicated to helping others feel beautiful and confident. Through her social media platforms, she inspires the nail community with creative ideas and tutorials.
Conclusion
Creating the ‘Stuck in Love’ nail art is not only a fun way to celebrate Valentine’s Day; it’s also an opportunity to express your creativity and style. With Lindsay’s detailed instructions, you can achieve a striking look that will leave everyone in awe. So gather your supplies and let your imagination run wild as you dive into this beautiful nail journey!


