Introduction
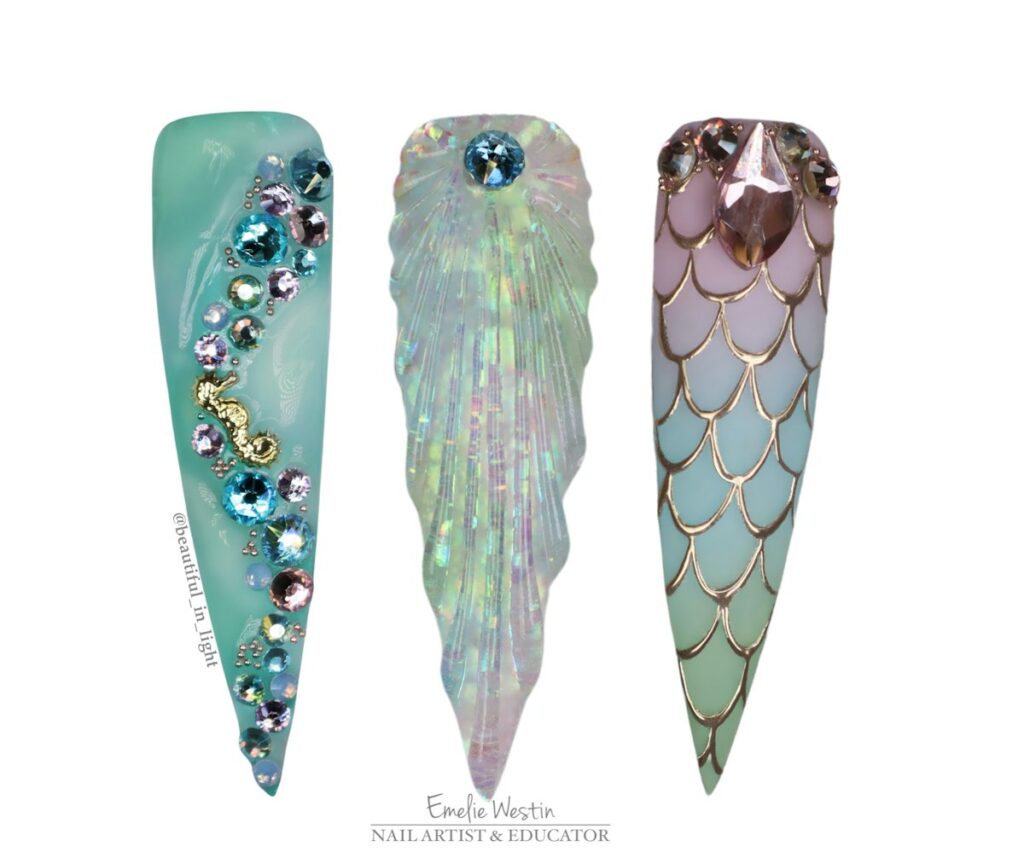
Summer is the perfect season to indulge in vibrant trends and fresh styles, and what better way to express yourself than through your nails? This summer, we’re diving into the depths of creativity with three stunning ‘Under the Sea’ nail tutorials. Inspired by the beauty of the ocean—from shimmering seashells to enchanting mermaids—these designs will make your nails sparkle like the waves under the sun. Join nail artist and influencer Emelie Westin as she guides you through each step to achieve these breathtaking effects.
Why Under the Sea Themes?
The ocean is full of life, color, and inspiration. From the calming hues of blue and green to the glittering textures of sand and seashells, the undersea world provides a perfect palette for nail art. Moreover, the trend of using pastel colors enhances the serene vibe of oceanic themes. As you implement these designs, your nails will reflect the warmth and brightness of your summer days.
Getting Started
Before we dive into the tutorials, it’s important to gather the right materials. Here’s what you’ll need:
- Base coat
- Pastel colored nail polishes (light blue, soft pink, mint green)
- Glitter polish
- Nail art brushes
- Nail dotting tools
- Top coat
- Seashells or mermaid-themed nail stickers (optional)
Tutorial 1: Mermaid Dreams
Step 1: Prepare the Nails
Start with clean, dry nails. Apply a base coat to protect your natural nails and allow it to dry.
Step 2: Apply Base Color
Choose a light pastel blue polish for this design, representing the color of the ocean. Apply two coats for an even finish and let it dry completely.
Step 3: Create Mermaid Scales
Using a nail art brush, dip it into a darker blue polish. Lightly press the brush against the nail in a pattern that mimics scales, creating a stunning mermaid-inspired look. You can add shimmering glitter on top for extra shine.
Step 4: Finishing Touches
Once the scales are dry, seal your creation with a top coat to prevent chipping and enhance shine. Optionally, you can add small seashell stickers on one or two accent nails.
Tutorial 2: Ocean Breeze
Step 1: Base Coat
As before, start with a base coat to protect your nails.
Step 2: Color Application
This time, choose a soft mint green polish. Apply two coats for vibrancy and allow it to dry.
Step 3: Wave Art
Using a nail dotting tool, create wave patterns using white nail polish or a light blue. Randomly dot them across the nail to imitate the ocean’s movement.
Step 4: Enhance with Glitter
For a fabulous finish, apply a sparking glitter polish over the dots to give a shimmering effect that resembles sunlight on water.
Step 5: Seal Your Design
Finish with a top coat to give it a glossy look and to prevent the design from chipping.
Tutorial 3: Seashell Elegance
Step 1: Prep the Nails
Again, start with a base coat.
Step 2: Soft Pink Base
Choose a pastel pink polish for the base. This color provides a beautiful backdrop for the seashell designs. Apply two coats.
Step 3: Seashell Details
With a fine brush, carefully paint tiny seashells and starfish using soft cream and beige shades over the pink base. Alternatively, apply seashell stickers for a quicker application.
Step 4: Glitter Sparkle
Add a layer of glitter polish to simulate the sparkle of sand glistening in the sun.
Step 5: Top Coat
Finish with a top coat to protect your artwork and provide a high-gloss finish.
Final Thoughts
These three ‘Under the Sea’ nail tutorials are perfect for showcasing your creativity while embracing a theme that resonates with summer fun. Whether your clients are diving into ocean waves or enjoying a sun-soaked day at the beach, their nails will be a perfect accessory for the season. Embrace pastel colors, glitters, and ocean-inspired art to make a splash this summer with stylish nails that captivate and inspire!

