Introduction to Golden Flutter Nails
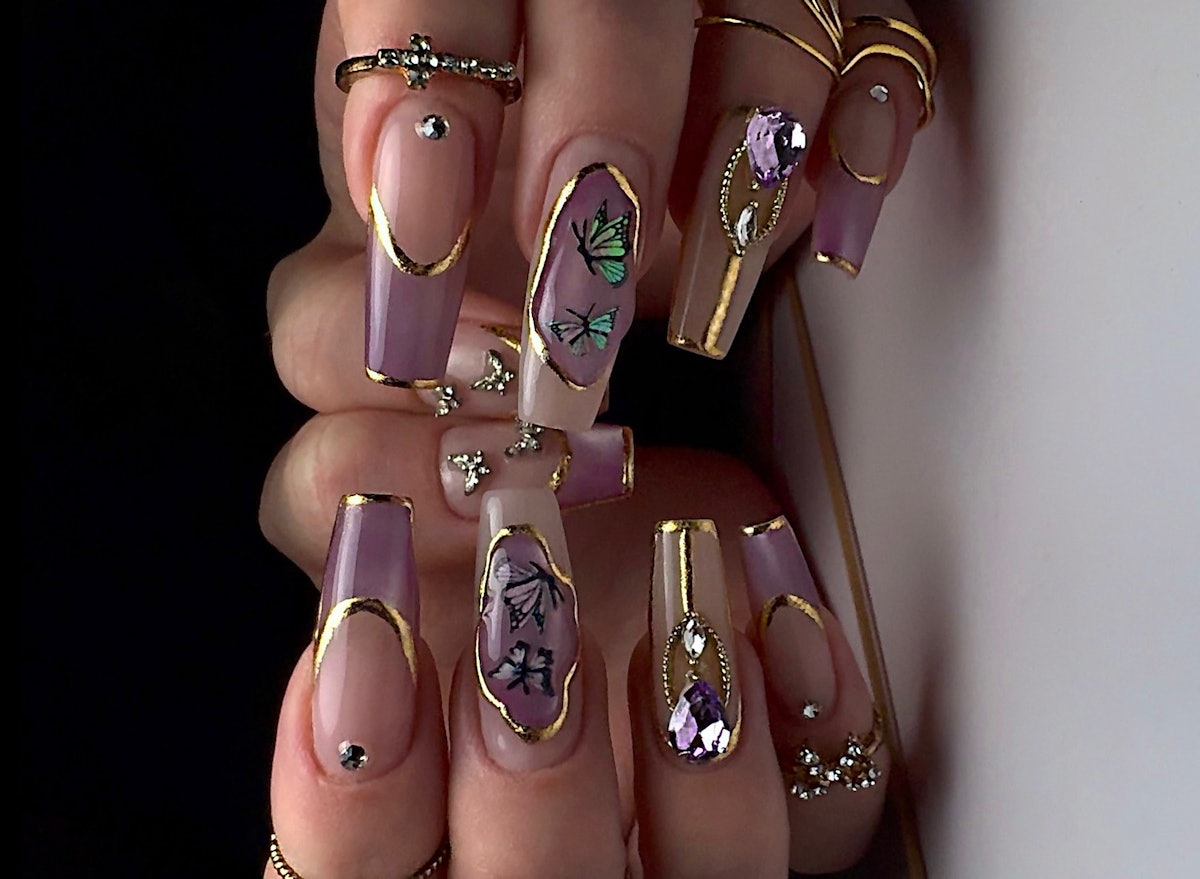
If you’re looking to elevate your nail game this spring, the golden flutter nails created by Deanna Stelmaschuk are perfect for you. Combining the beauty of purple butterflies with stunning gold chrome accents, this design is a celebration of spring’s vibrant energy.
Who is Deanna Stelmaschuk?
Deanna Stelmaschuk is a prominent content creator and nail competitor from Kelowna, British Columbia. Her artistry is inspired by nature and fashion, making her nail designs unique and attention-grabbing. With a passion for nail art that shines through her creations, she continues to inspire others in the beauty community.
Understanding the Design Elements
The golden flutter nails feature a delicate balance of colors and textures. The softness of the purple butterflies contrasts beautifully with the striking sheen of the gold chrome finish, encapsulating the essence of spring.
Color Palette
The primary colors used in the golden flutter design are:
- Purple: Symbolizes beauty and is perfect for spring.
- Gold Chrome: Adds a touch of luxury and shine.
Design Inspiration
Nature is a key inspiration for this design, with the butterfly symbolizing transformation and beauty. Incorporating these elements into your nail design helps to bring the freshness of spring to your fingertips.
Step-by-Step Guide to Creating Golden Flutter Nails
What You’ll Need:
- Base coat
- Purple nail polish
- Gold chrome polish
- Nail brush or dotting tool
- Top coat
- Nail adhesive for decorations (if desired)
Step 1: Prepare Your Nails
Start by cleaning your nails and pushing back the cuticles. Apply a base coat to protect your natural nails and allow it to dry completely.
Step 2: Apply Purple Base
Using a purple nail polish, apply two coats to achieve an even and opaque finish. Allow each layer to dry before applying the next.
Step 3: Create Butterfly Designs
Using a nail brush or dotting tool, create delicate butterfly shapes on your nails. You can reference pictures of butterflies for accuracy. Use a slightly lighter shade of purple or white to create the outlines and patterns on the butterflies.
Step 4: Add Gold Chrome Accents
Apply gold chrome polish to select areas on your nails or on the butterfly designs to create eye-catching accents. This adds dimension to your nail art.
Step 5: Top Coat for Shine
Once your designs are complete and dry, apply a top coat to seal the look and add extra shine to your nails. This step not only enhances the beauty but also prolongs the wear of your design.
Tips for Maintaining Your Golden Flutter Nails
To keep your golden flutter nails looking fresh and vibrant, consider the following tips:
- Moisturize your hands and cuticles regularly.
- Avoid using your nails as tools to prevent chipping.
- Reapply top coat every few days to maintain shine.
Where to Get Inspired
For more nail art inspiration, follow Deanna Stelmaschuk on her Instagram [@deannastelmaschuk](https://www.instagram.com/deannastelmaschuk/?hl=en). Her feed is filled with creative designs that showcase her unique flair for nail art.
Conclusion
Golden flutter nails are a beautiful way to welcome spring. With their vibrant colors and intricate designs, they are sure to turn heads. Follow this guide to create your own set and let your nails blossom this season.


