Introduction
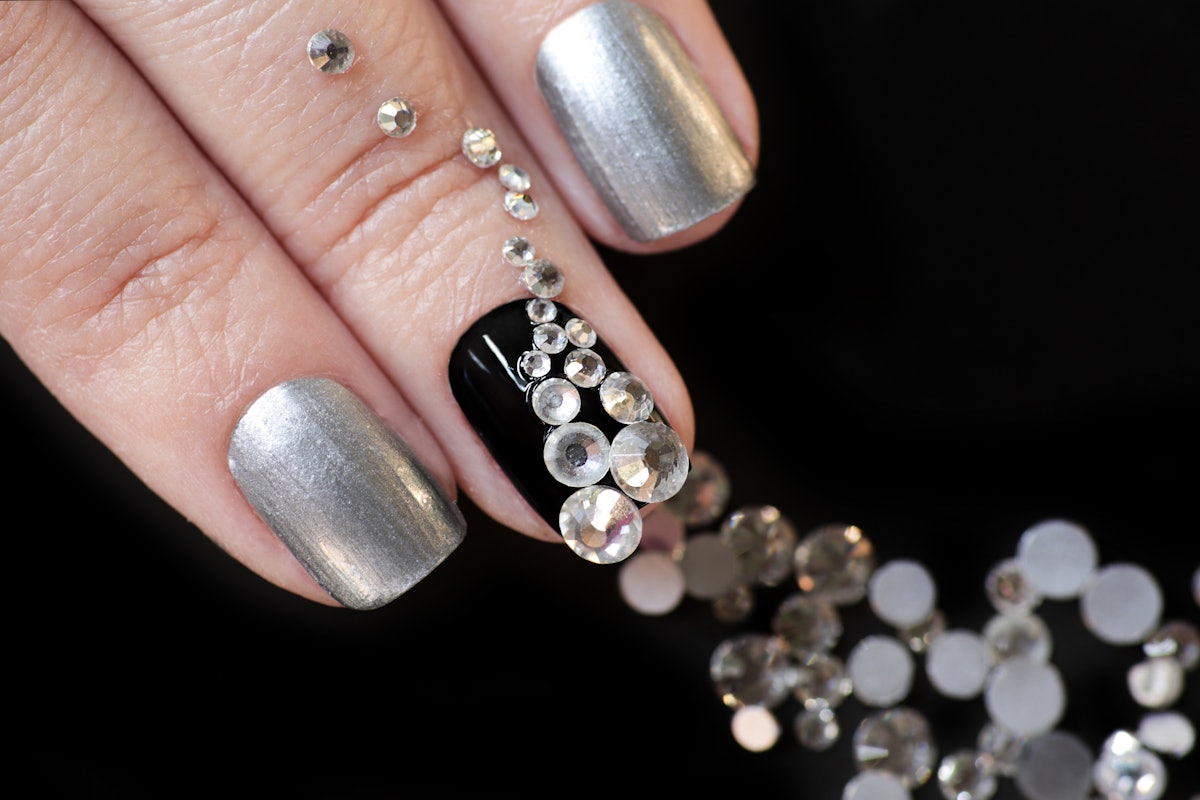
Nail gems have become a staple in the world of nail art, providing an easy way to add sparkle and dimension to your manicures. However, the key to achieving maximum brilliance and ensuring that these gems stay put involves the right techniques and products. In this article, we’ll dive into expert advice on how to apply nail gems so they last, with tips from seasoned nail artists.
Choosing the Right Gems
The first step in a successful nail gem application is selecting the appropriate embellishments. Acrylic gems are cost-effective and come in various colors and shapes, but they may not provide durability or shine. In contrast, glass or synthetic crystals offer a more sparkly appearance and sturdiness, albeit at a higher price. For larger gems, opt for those with a slight curve at the base to prevent snagging. Veteran nail artist Ziggy Silvestro advises using flat-backed stones that are no larger than 8mm to ensure a stronger hold.
Attachment Methods
Using Nail Polish
Attaching gems with nail polish is a good option for temporary applications. This method works best for clients who frequently return for manicures or wish to try nail art without a long-term commitment. To apply gems with nail polish:
- Finish applying the nail polish and allow the top coat to dry slightly.
- Press the gem into the wet top coat, ensuring it’s set just right: wet enough to adhere but not so wet that it slides around.
- Use a nail art brush to apply top coat around the base of each gem for added security.
Be sure to inform clients about the possibility of gems falling off, as this method lacks long-lasting power.
Using Glue or Resin
Nail glue provides a stronger hold and is suitable for longer-lasting applications. However, caution is necessary as it can potentially damage the stones. Here’s how:
- Ensure that the nail polish is completely dry before application.
- Apply a quick-set glue directly onto the nail rather than on the gem for better adhesion.
- For positioning, utilize a moistened cuticle stick for precision.
- To enhance durability, add more glue at the base of each stone.
Using Gel Polish
Gel application is the most robust technique, allowing for the use of larger gems and a safe soak-off process. Here’s how to effectively use gel:
- Begin by applying a thick gel to secure the gem.
- Ask your client to pivot their hand during the curing process to ensure the gel cures evenly around the stone.
- After curing, use medium-thin viscosity gel to cap the edges of the gem, securing it in place effectively.
Maximizing Durability and Placement
The placement of gems is crucial for both aesthetics and durability. Silvestro suggests placing gems closer to the cuticle for optimal security since this area experiences less flex. However, caution is advised; placing gems too close can complicate future nail growth and maintenance. It’s advisable to use smaller stones if working on natural nails to prevent them from popping off at stress points.
Step-by-Step Guide to Applying Nail Gems
How to Adhere Nail Gems
- Prep the nail by applying two coats of gel polish, curing after each application.
- Use a lint-free wipe with cleanser to eliminate the tacky layer without applying a top coat.
- Buff the base of the nail lightly to prepare for the adhesive.
- Place a small amount of gel adhesive onto the buffed area.
- Using a pointed wax pen, pick up and place the gem at an angle on the gel adhesive. Repeat for additional gems, then cure the nail.
- Apply resin around the gaps of the larger gems for added security, and spritz with an aerosol nail drying spray for better adhesion.
Conclusion
Applying nail gems doesn’t have to be daunting. With the correct techniques, products, and placements, you can create designs that are not only stunning but also long-lasting. Experiment with different methods to find the perfect combination that suits your style and your clients’ needs. Keep practicing, and soon you will become a pro at securing those sparkling gems on every manicure!
For more tips and inspiration, follow Nailpro on Instagram and subscribe to our daily newsletter.


