Introduction
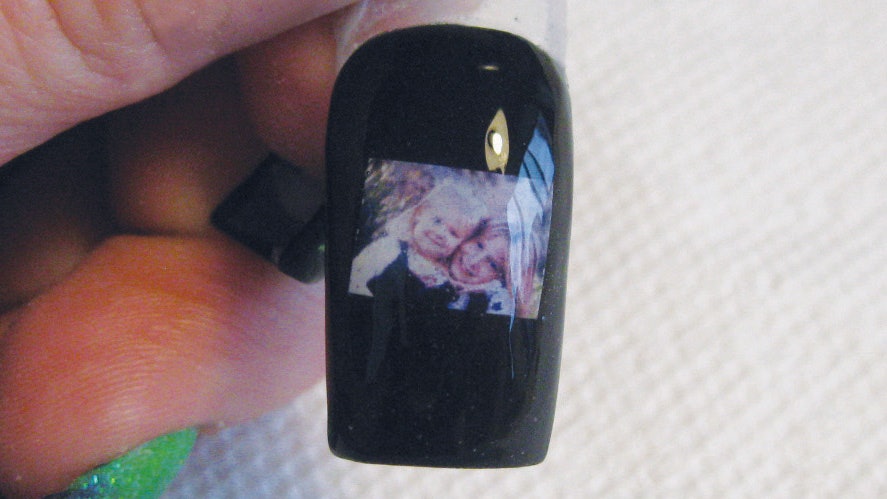
One of the things that clients love about nail art is its ability to provide them with a unique set of nails created just for them. Among the various trends in nail design, embedding photos into nails stands out as an innovative method to personalize one’s look. Whether it’s a celebrity crush for a teen, a beloved pet for an animal lover, or a heartfelt picture for a bride-to-be, the possibilities are endless.
The Appeal of Photo Nails
Gone are the days when photo nails were exclusively for older clientele reminiscing about their grandchildren. Today, photo nails cater to a broad audience, appealing to clients of all ages. The key to selling this design is to present it in a way that captures the interests of your clients. Imagine your clients displaying their memorable moments on their nails, making every glance at their hands a reminder of something or someone precious.
Getting Started: Preparing the Photos
Olivia Gordon, a nail technician at The KRU in Lancaster, California, shares her expertise on how to incorporate embedded photos into nail services effectively. The first step is obtaining the photos. Ask your clients to text or email you pictures they want embedded. Once received, format them appropriately for printing.
Using a basic photo-viewing program, shrink the photos to their smallest size. Gordon recommends printing a ‘contact sheet’—a sheet that maximizes the number of small photos printed on a single page (typically 4×6 inches). This method ensures that you have many images ready for your clients.
Choosing the Right Paper
Choosing the correct type of paper is crucial for this process. Gordon has discovered that inexpensive photo paper works best because it’s thinner. Regular photo paper tends to absorb ink differently, which can affect the final application on nails.
Cutting Out the Photos
After printing, your photos need to be cut out into the desired shapes. You can use small scissors or an X-acto knife for precision. A scrapbooking hole punch is often preferred because it produces a perfectly sized cutout for nail art.
Prep Steps for Embedding Photos
-
Print the photos using the thinnest photo paper you can find.
-
Cut or punch the images to the desired shape and size.
-
Ensure both you and your client wash your hands; then prep the nails as per usual standards.
-
If using nail tips, apply and refine them to prevent bulkiness during the embedding process.
-
Apply an acid-free primer on the nails.
-
Shape the photo by bending it around a brush handle to ensure it doesn’t pop up when embedded.
Embedding Photos into Acrylic Nails
-
Apply a thin layer of acrylic and quickly place the photo into the acrylic. Hold it in position with tweezers or an orangewood stick until it starts to set.
-
Once the acrylic turns dull, press the C-curve.
-
Embed the photo firmly with clear acrylic, ensuring not to pile it too thickly. The ideal liquid to powder ratio is crucial to avoid air bubbles—experiment with various brands for the best results.
-
Once the nail is shaped correctly, use a 180-grit file to refine it carefully, ensuring no filing through to the photo occurs.
-
Apply polish around the embedded photo and decorate as preferred, finishing with a topcoat or gel sealer.
Embedding Photos into Gel Nails
-
Start with a thin layer of builder gel; cure it for two minutes between layers. If using colored or glitter gel, apply the base first, cure, then add the glitter layer before a final thin clear layer over the glitter.
-
Remove tacky residue using a lint-free wipe and appropriate cleanser.
-
Shape the nail carefully, keeping it thin during the process.
-
Clean thoroughly with acetone or another recommended cleanser.
-
Using brush-on glue, adhere the photo to the surface ensuring no bubbles are present.
-
Finally, apply a clear hard gel over the photo and entire nail. Cure, buff, and finish with gel polish or paint as desired with a top coat.
Conclusion
Embedding photos in nails offers a unique and personalized touch to any manicure. It requires creativity, precision, and the right techniques, but the result is a stunning piece of nail art that your clients will love. Use your imagination, listen to your clients, and embark on this exciting nail art journey!


