Introduction
Broken nails can be a significant source of frustration, especially for those who prioritize nail care. Daily activities often lead to unexpected breaks or chips, even when we take our best precautions. In this guide, we will provide a step-by-step process to repair broken natural nails effectively. Whether it’s fixing a tear or a chip, following these directions will enable you to restore your nails to their best condition.
The Causes of Broken Nails
Understanding why nails break can help prevent future incidents. According to Orly education ambassador Carla Collier, the most common cause is daily use. Tasks such as using your phone, opening cabinets, or even just typing on a keyboard can contribute to nail damage. Incorporating regular moisturizing practices and using gloves for heavy-duty tasks can keep your nails healthier and minimize breakage.
Tips for Nail Care
- Apply oil and lotion consistently to maintain nail flexibility.
- Choose a nail length and shape that aligns with your lifestyle—long nails may not be suitable for active individuals.
- Communicate with your nail technician regarding your preferences and expectations for nail repairs.
Types of Nail Breaks and How to Fix Them
Even with the best care, occasional breaks can happen. Below are methods to effectively repair two common types of nail damage: tears and chips.
Fixing a Tear
-
Lightly buff the surface of the nail to remove excess shine. Ensure not to over-buff, as this could further damage the nail’s surface. Next, cleanse the nail thoroughly using a nail cleanser or isopropyl alcohol to remove oils and moisture.
-
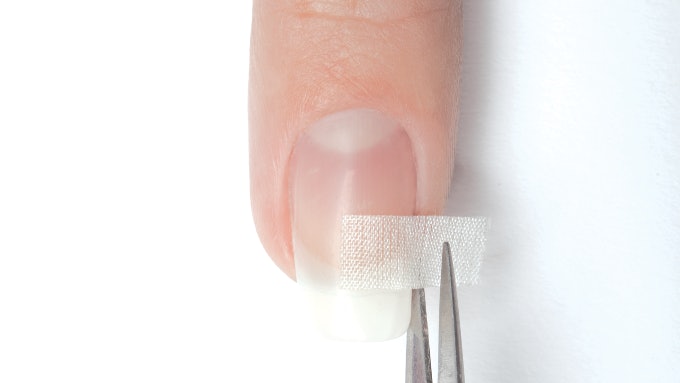
Cut a rectangular piece of adhesive silk wrap that is large enough to cover the tear. Some technicians recommend covering just the break to keep the nail looking natural. Use tweezers for precise placement, ensuring it adheres smoothly.
-
Trim the silk wrap to fit the nail perfectly.
-
Saturate the silk with gel base coat and perform a flash cure.
-
Apply another layer of gel base coat over the entire nail, then cure.
-
Lightly buff the surface with a 240-grit sponge file to smooth out the repair.
-
Finish with your usual manicure and polish. Advise the client to take special care of the nail until the break has fully grown out.
Fixing a Chip
-
Similar to fixing a tear, begin by lightly buffing the nail surface and cleansing it. This prepares the nail for the repair.
-
Apply a form to the nail area where the chip has occurred. With builder gel, carefully sculpt the missing corner of the nail, overlapping the natural nail slightly to ensure stability.
-
Once you’ve sculpted the area, cure under a UV light and then remove the form.
-
Next, apply gel polish over the entire nail and cure for durability.
-
Use a 240-grit sponge file to smooth any uneven areas before applying a clear coat of traditional or gel polish for a polished finish.
Final Thoughts
Regular maintenance and proper at-home care are crucial in preventing nail breaks. However, understanding how to repair broken natural nails can empower you to keep your nails looking their best even when accidents occur. If repairs are substantial, consider booking a follow-up appointment to ensure the integrity of your natural nails is maintained. With the right techniques and care, you can enjoy beautiful, healthy nails!
For more tips on nail care and repair, visit expert blogs like workplaypolish.com and keep your nails looking stunning!


