Introduction
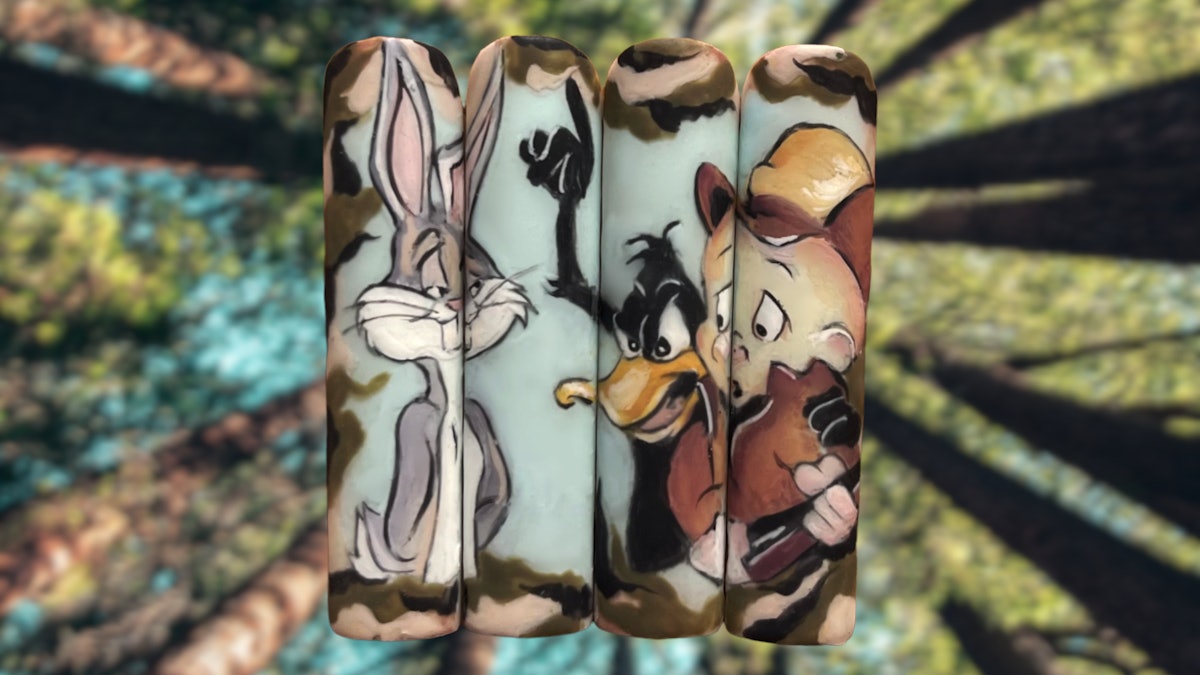
If you’re a fan of the classic Looney Tunes characters and love expressing your creativity through nail art, you’re in for a treat! This guide will take you through the steps to create stunning Looney Tunes-themed nail designs, inspired by the talented U.K. nail artist Rachel Hanks.
Rachel, known for her intricate designs, developed this artistic nail design taking inspiration from her hobby in pest control, channeling her inner Elmer Fudd. In addition, she has created innovative nail trace tabs that assist nail technicians in perfecting their designs. Let’s dive into the exciting world of Looney Tunes nail art!
What You Need
Before you get started, gather your materials to ensure a smooth nail art process:
- Gel polish in various colors
- Velvet matte top coat
- Nail trace tabs (available at Print By Example)
- Nail tips
- Pencil for sketching
- Buffing block
Step-by-Step Instructions
1. Nail Preparation
Start by prepping your nail tips and apply a base gel polish color. For a Looney Tunes vibe, consider using a bright background color like blue. Rachel suggests using blue tac to securely hold the nails in place while drawing.
2. Adding the Velvet Matte Top Coat
Once your base color is dry, apply a velvet matte top coat. This will create a suitable surface to sketch your designs with a pencil, ensuring they come out perfectly aligned.
3. Coloring the Design
To ensure a thinner and smoother finish, use gel polish to color in your designs. Rachel recommends mixing gel polish colors to achieve a gradient effect. Work while the polish is wet to blend in darker and lighter colors for a dynamic look.
4. Smoothing Out the Paint
Apply a matte top coat between layers to smooth out your artwork. Remember, less is more when applying gel polish. A thin layer is crucial for achieving that polished look.
5. Sealing Your Design
Once you’re satisfied with your artwork, seal the design with a top coat. Use your buffing block to eliminate any bulkiness and ensure a flat finish. Rachel chose to add camouflage to make the characters pop before completing her nail art.
Final Thoughts
And that’s all, folks! You’ve just created fabulous Looney Tunes nail art that showcases your love for these beloved characters. For a visual reference, check out Rachel Hanks’ step-by-step process on her Instagram. Keep practicing and unleash your creativity to wow your clients or friends with your unique nail art skills!
Stay Connected!
For more nail care updates and inspiring ideas, follow Nailpro on Instagram and subscribe to our newsletter to stay informed about the latest trends in nail art and design.


