Introduction
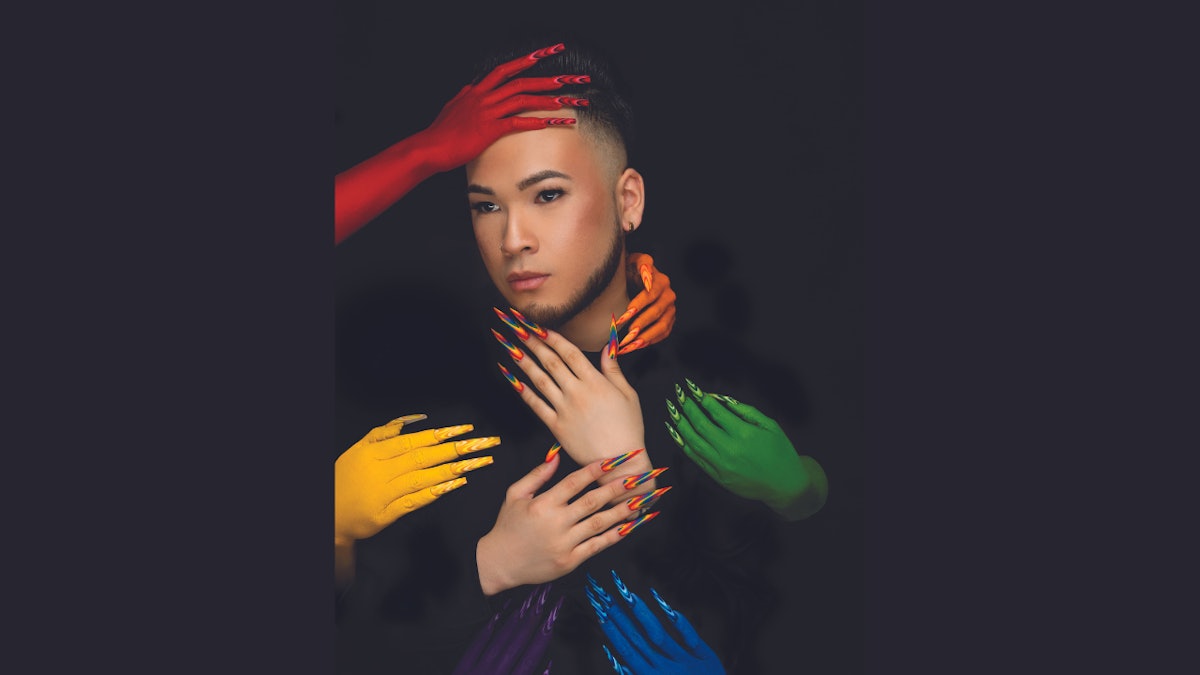
The world of nail art is a vibrant canvas filled with creativity and self-expression, and at the forefront of this colorful revolution are talented professionals who bring a unique flair to their designs. In our industry, the celebration of diversity is not just important; it’s integral to the essence of nail artistry. With this in mind, we are thrilled to present a Rainbow Nail Art Tutorial that not only showcases stunning techniques but also honors the LGBTQIA+ community, inspired by Hirsch Hunty, a recognized talent in the field.
Celebrating Creativity in Nail Art
The nail community is more than just a collective of artists; it is a diverse tapestry woven from the experiences, identities, and imaginations of its members. This makes the nail industry one of the most inclusive spaces, allowing for a variety of styles that reflect the beauty of our individuality.
Hirsch Hunty: A Spotlight on Talent
Hirsch Hunty, known on Instagram as @nailsbyhirsch, has captured the hearts of many with bold and imaginative designs. Their work has been featured widely, and for good reason. They embody the spirit of creativity and innovation our May/June issue aims to celebrate. By highlighting artists like Hunty, we showcase how nail art can be a powerful means of expressing identity and advocacy for inclusivity.
Getting Started with Rainbow Nail Art
Now, let’s dive into the Rainbow Nail Art Tutorial. This guide will provide you with step-by-step instructions to create your very own rainbow-themed nails. Gather your materials and let’s get creative!
Materials Needed
- Nail polish in various rainbow colors
- Nail art brushes
- Base coat and top coat
- Dotting tools
- Nail tape (optional)
- Acetone and cotton balls for cleanup
Step-by-Step Tutorial
Step 1: Prep Your Nails
Start by removing any previous nail polish and shaping your nails. Apply a base coat to protect your natural nails and create a smooth canvas for your art.
Step 2: Apply the Base Colors
Choose your favorite rainbow colors and apply them as base coats to each nail. You can either use different colors on each nail or create a gradient effect by blending them together. Allow the polish to dry fully before proceeding to the next step.
Step 3: Design the Rainbow
Using nail art brushes, start painting arcs of each color to form a rainbow design. If you’re nervous about freehand painting, nail tape can help create sharp lines. Make sure to let each layer dry before adding the next one.
Step 4: Add Details
For additional flair, consider adding small white dots or stars around the rainbow using a dotting tool. These details can enhance the overall look and give it that extra pop!
Step 5: Top it Off
Once you’re satisfied with your design, apply a clear top coat to protect your artwork and give it a glossy finish. This will also help your design last longer.
Tips for Nail Art Success
Creating beautiful nail art takes practice, and there are a few tips that can help you improve your skills:
- Experiment: Don’t be afraid to try out new techniques and combinations of colors. Every artist develops their own signature style.
- Stay Patient: Nail art can be intricate work; take your time to achieve the best results.
- Follow Trends: Stay updated on current styles and techniques through social media platforms; there’s always inspiration to be found!
Conclusion
Rainbow Nail Art is not just a design; it’s a celebration of diversity, creativity, and community. With guidance from professionals like Hirsch Hunty and others in the industry, we can uplift each other and embrace our uniqueness. So gather your supplies, unleash your creativity, and wear your rainbow nails proudly—not just for pride but as a statement of who you are and what you stand for.


