Introduction to Halloween Nail Art
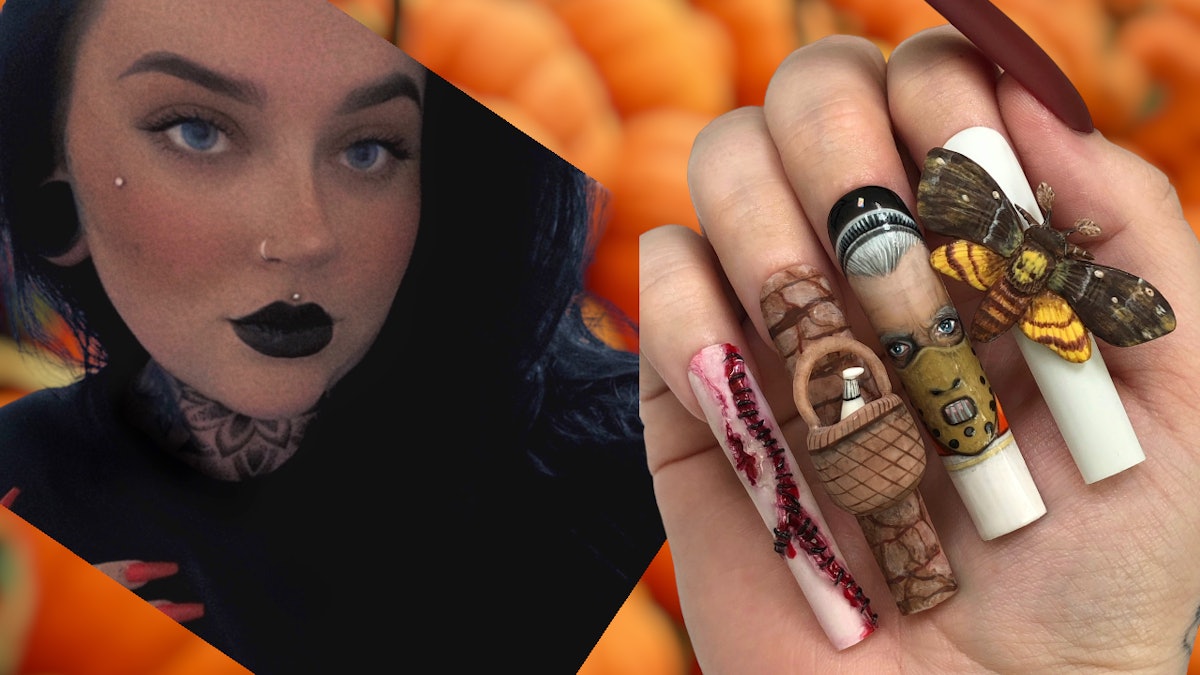
Spooky season is here once again, and it’s time to unleash your creativity with stunning nail sets. Halloween is not just about costumes and candy; it’s also about showing off your personality through personalized nail designs. Tyler Coxon, a renowned nail artist, shares his top tips on creating detailed nail sets that will impress during this haunting season.
The Importance of Nail Art in Halloween Celebrations
Nail art can elevate your Halloween look, giving it that final touch that makes a statement. Whether you want to embody a witch, a pumpkin, or something more abstract and eerie, your nails can reflect your inner creativity. Additionally, nail art allows for personal expression, making it a fantastic way to participate in the seasonal festivities.
Choosing Your Halloween Theme
The first step to creating stunning Halloween nail designs is selecting a theme. Tyler recommends considering what aspect of Halloween resonates with you the most. Some popular themes include:
Classic Halloween Icons
Icons like witches, ghosts, pumpkins, and skeletons are always a hit. These timeless symbols allow for various artistic expressions, from cute to spooky.
Terrifying Horror Movies
Are you a fan of horror films? Draw inspiration from your favorite characters, such as vampires, zombies, or classic movie monsters. This will give your nails a thrilling twist.
Whimsical and Cute Designs
If you prefer a lighter approach, go for whimsical characters like friendly ghosts and cartoon pumpkins. This style is perfect for those who want to celebrate without being too spooky.
Essential Nail Art Supplies
Before you start creating your Halloween nail designs, gather the necessary supplies. Here’s a quick checklist of items recommended by Tyler:
- Nail polishes in various Halloween color palettes (orange, black, purple, green)
- Fine detail brushes for intricate designs
- Nail art pens for precision work
- Stickers and decals for quick designs
- Glitter and gemstones for an extra flair
Step-by-Step Guide to Creating Halloween Nail Sets
Now that you’re armed with supplies and a theme, let’s dive into a step-by-step guide to creating your Halloween nail art:
Step 1: Nail Preparation
Start with clean and trimmed nails. This step is crucial in ensuring that your designs last as long as possible. Buff the surface lightly to create a smooth canvas.
Step 2: Base Coat Application
Apply a base coat to protect your nails from staining and enhance the longevity of your nail design.
Step 3: Applying Base Colors
Choose your base colors according to your theme. If you’re going for a classic Halloween look, apply orange or black polish. Allow it to dry completely before proceeding.
Step 4: Detailing Your Design
With a fine detail brush, start sketching your chosen designs. Whether it’s spider webs, skulls, or bat silhouettes, take your time to ensure precision. For beginners, using nail art pens can make this process easier.
Step 5: Adding Embellishments
Once your main design is dry, consider adding embellishments like glitter or rhinestones to give your nail set that extra pop. Tyler suggests using clear nail polish to adhere them effectively.
Step 6: Finishing Touches
Seal your design with a top coat to protect it and provide a glossy finish. This step is essential for preserving your artwork.
Caring for Your Halloween Nail Art
After spending time creating your nail art, proper care is essential to ensure longevity. Here are some tips Tyler recommends:
- Avoid soaking your nails in water for long periods, as this can weaken the polish.
- Wear gloves when doing household chores to prevent chipping.
- Keep your nails moisturized with cuticle oil to maintain healthy skin around your nails.
Conclusion
Creating detailed Halloween nail sets can be a fun and rewarding way to celebrate the spooky season. With Tyler Coxon’s expert tips, you’ll be able to unleash your creativity and craft nail designs that truly make a statement. Remember to embrace your uniqueness and have fun during the process. This Halloween, let your nails reflect your spirit and creativity!


